Showing posts with label furniture. Show all posts

Monday, February 4, 2013

We've Been Busy!! {Ombre Mint Dresser}


Projects. Projects. Projects have been filling most of our weekends. We tackled quite a few since I've been on a nesting kick to get things done before I pop. One such project was our downstairs tv situation. It had become quite a situation...
{the before... all manner of bad.}

We got a tv as a birthday gift a few years ago from my parents. We don't have basic tv but sure enjoy movies and hulu. So, it's been sitting on this small entertainment unit right from the beginning. One of those "temporary solutions that quickly turned permanent" as the years piled on. Enter Theo: our tornado toddler. He would get into the DVDs and fiddle with our player every.single.day. It was getting old. Quickly.

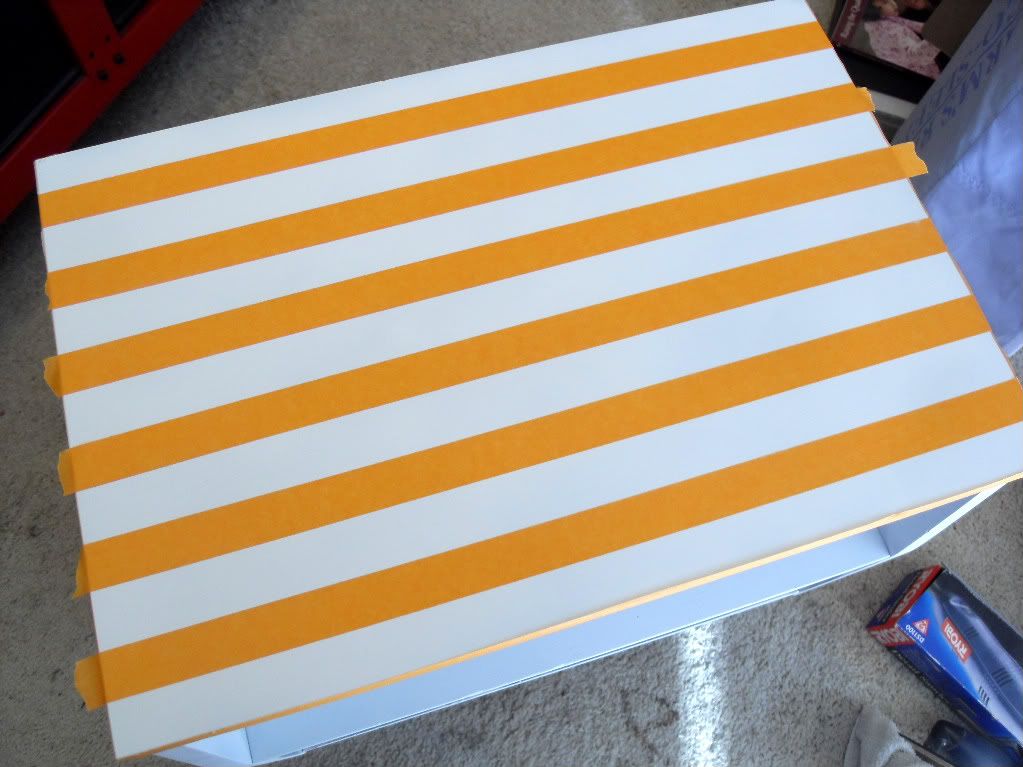
So, W found a great deal on Amazon for a tv wall mount and I hunted craigslist {like it was my part-time job} looking for a dresser that would fit our mini-wall's dimensions without being a road obstacle for foot traffic. Found a dresser, but didn't love its look so I knew immediately when we bought it that I'd be re-doing it. But it had a veneer finish. My quick search online led me to chalk paint.

I'd heard of the stuff but didn't really know much beyond the words "chalk paint" "shabby chic" and "Annie Sloan". So after a mini-lesson {there are a lot of posts out there on it}, I learned about its "chalky" or thicker properties, zero prep-work benefit, and that it adheres to pretty much any surface without hassle. I also learned the price point of AS chalk paint. Yikes! So when I found I {Heart} Naptime's homemade recipe, I figured "why not?" All I had to buy was my normal paint in the colors I wanted + plaster of paris. Easy enough.

4 T Plaster of Paris to 2T HOT water
Mix in container until all the clumps are gone
Mix into 2 cups of paint


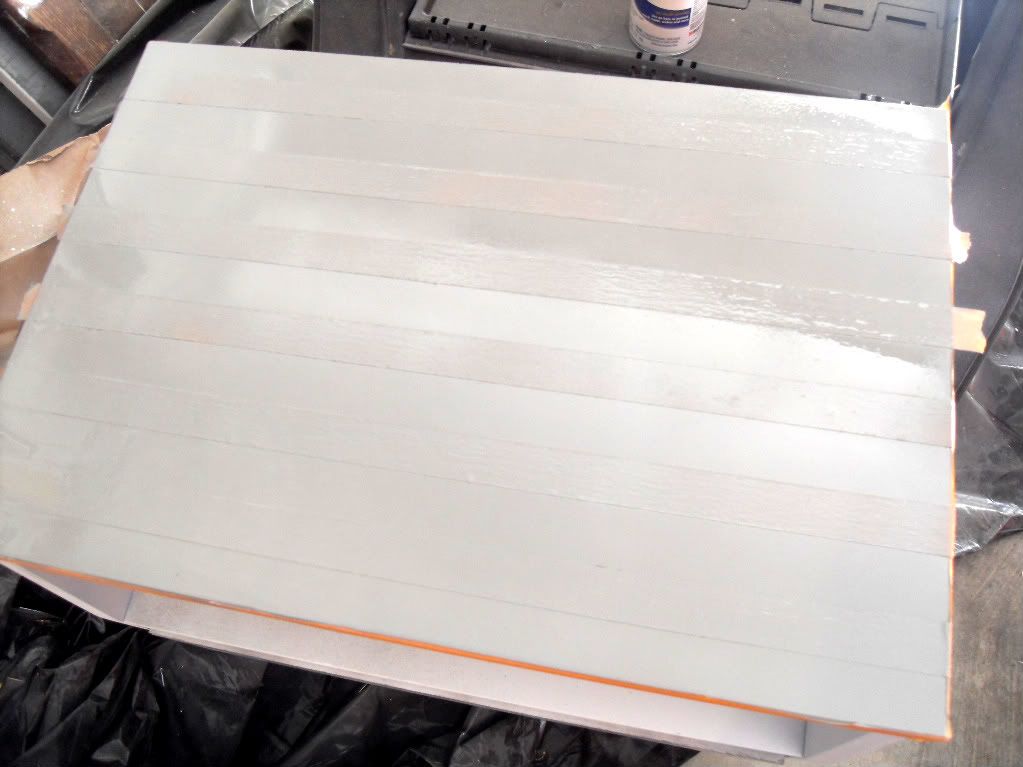
At the store, I bought my Plaster of Paris {$6}, my normal gallon of classic white, and then four sample sizes of a paint card I liked: graduating shades of mint. I went with a half batch of chalk paint in each of the five colors because my dresser had so many different colors and not much of each. Worked like a charm.

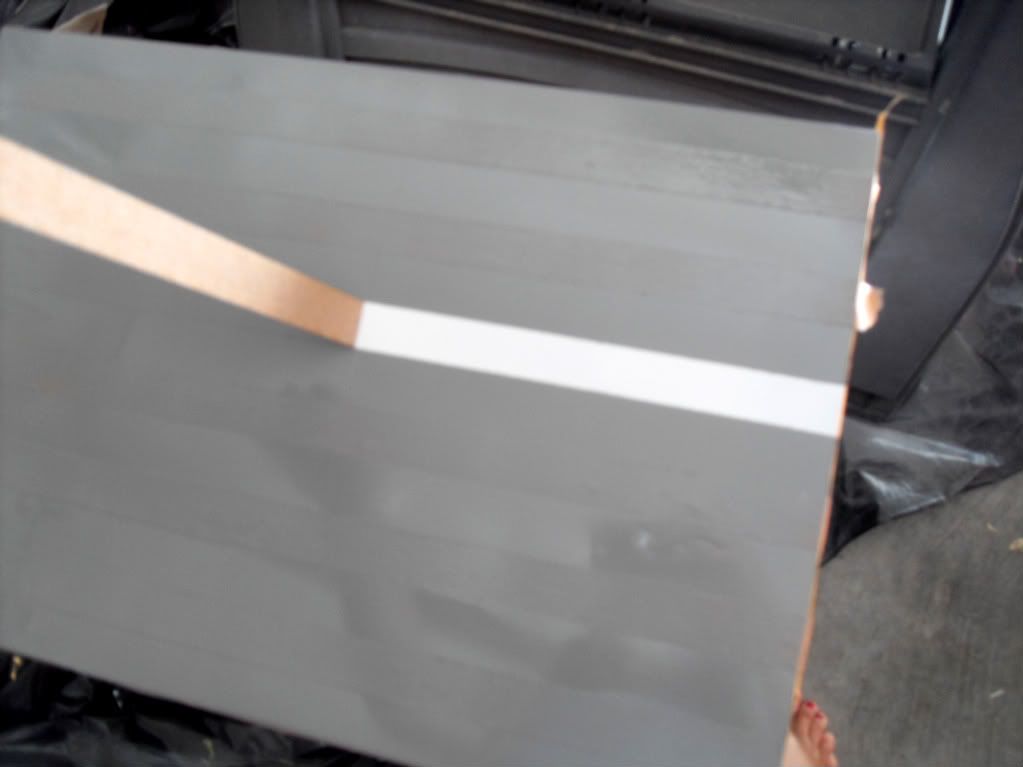
I did minimal sanding since I didn't really want a distressed look for the dresser. I then covered it in a polyurethane protective coat that we already had on hand. I would love to try the wax finish sometime. Heard it really finishes off the piece nicely. Next time. ;)


We mounted the tv, put the dresser in {after drilling a hole in the back of the top drawer for cords}, and mounted my antler project: ebay antlers + white spray paint + gold craft paint


We are loving the extra storage {currently the bottom two drawers are still empty! So huge for us. ;)}, and the simple fact that T is not creating a mess nor are our movies out for all to see {tacky!!} Definitely one of those "feels so good" projects.

Tuesday, June 28, 2011

Seeing Stripes!

My newest victim got a nice new coat of white and stripes over the weekend.

I was feeling a bit daring so I wanted to try out something new. Being a newbie at all this DIY stuff, I've got a lot to catch up on. I seriously thought about being double-dog daring and going full-steam ahead with some Chevron zig-zags, but then I thought better of it. Can't get too far ahead of my very amateur skills.

First, I covered my whole piece with white primer. We did do some sanding beforehand, but it's really not necessary when spray painting. After the coats of primer dried, I started in with the stripes. I covered the entire border surrounding my top to make sure no gray got else where. And since the piece was pretty small, I wanted stripes a bit over an inch wide. I pulled out a level and used it as a measuring tool. Then I laid down my tape at each interval, making sure to check both the left and right ends for correct width spacing.
{I left the end-tabs up to make for easy removal after I painted.}

Once the whole top was taped up, I let loose with "classic gray" and covered the entire top with it.
I waited a few seconds then started to peal off my tape. There were a few bleed marks that I had to touch up, even though I made sure to press down on my tape...eh, I'll just chalk it up to me being a newbie. And they were the only thing I can focus on--see what I mean...
To cover the gray run-over, a small paint brush and some white craft paint did the job. I'm sure there must be a more professional method, but I wanted them gone asap and those were the supplies that I had on hand. Worked for me!

I repeated the same steps striping steps on the little drawer but on a much smaller scale and with no bleed-through issues. AND I loving me some stripes! Can't wait to put this in E's room! Such a fun transformation, and one that I did all on my own this time..well, with some helpful teaching and input by W.

To see link-ups, go to bottom of page!

Monday, June 27, 2011

Such a Tease

Someone got a little daring over the weekend...
First time trying out stripes...

And I'm in love! I'll show the reveal tomorrow of victim's newest coat!

Thursday, June 16, 2011

How to Decorate Series

I stumbled upon House Stories A to Z just in time for her June series for DIY'ers. Some great advice, pictures, and ideas can be found over here--including the recent and inspiring "decorating with furniture".
Definitely worth your time to explore these posts!

Saturday, June 11, 2011

Big Boy Bed

A few days ago, W was done with work pretty early so we had some fun putting together a few of the last major components of E's room. One of which being: his bed! I was shying away from it and loving the idea of waiting until the last minute to switch him over, but W was all over it like white on rice. So we dove right in!
I put his comforter, a few pillows and stuffed animals on and sat back to have a "I'm totally a Mama" moment and "He's not a baby anymore" moment as well. E was really excited about it. We played in the room for awhile. He hopped on and off the bed several times. The fabric letters still need a home on the wall but I pulled them out just to see what they would look like.

He did great with the normal bedtime routine--only got up once and W walked and sung him back to bed.  Then he was out for the night. We sneaked back in several times before going to bed, just to check on him and laugh at his various positions. Although he getting older, it still seems like he's too young for a regular bed! Maybe it's because I know two-going-on-three year olds who are still in cribs?! Either way, he still looked so cute and precious!
He did totally great during the night and during naps. I'm so proud that he didn't fall off but still sad that he's becoming such a big boy so fast! I'm definitely in need of a baby fix.

Eek! Final reveal coming so soon, I promise. I'm sure ya'll are sick of reading about this redo by now. ;)

Tuesday, June 7, 2011

I'm a Guest!

{Archive from 6.3.11}


Today, I'm guest posting over at my girlfriend's blog: the Newlywife about our DIY adventures and our awesome-ized dresser! Newlywife is a great resource for all things married, frugal, and household related. Take a gander if you get the chance!

Dresser Reveal {Not Your Gma's Dresser}

{Archive from 5.25.11}

What we thought would be a bear of a project turned out to be fun! We were going to leave this as the very last thing to do, but when some friends volunteered to helped, we jumped at the chance after E's bookcase.

Here's the before:
This piece was my grandparents. It's in really good shape--we were the ones to put all the scratches and scraps in it. My grandma told me they bought it at an estate sale in 1973 while they were living in Kansas. It was part of a multi-piece set and survived many moves. She grumpily gasped a little when I told her we were paining it yellow. The cherry finish is really nice, just not my style. She relaxed a bit when I said our new color scheme for the master is yellow and gray-- she had a lot of yellow in her house...classy lady, that one!!

And our after:
Now, my favorite piece of furniture we have!

Easter weekend, W was able to get some friends over to help with the hardest part: sanding down the dark finish. What would have taken him several evening hours, ended after 3 hours. It's amazing how far a bribery of beer and fresh deli sandwiches can get ya!

 The dresser: post-sanding
The guys were so quick that we had to call it a day because I hadn't even purchased the paint yet. So we had to let the dresser hang out in the garage. With our entire contents just hanging out in our room. Just lovely.
{This picture is giving my dad a heart-attack right about now.}

I'll spare you the pictures of what it all looked like post-vacation, a few weeks later. Not pretty. E started jumping on our piles like he does when I'm putting the laundry anyway. I knew it was time to get back to working on this sucker when we started collecting baskets of clean clothes on the floor too-- reminds me of my disastrous room in high school...eh. moving on...

After I finally committed to a color, it was back to the rollers again to prime.


Some light sanding and two coats of Behr's Citrus Zest later and we were in dresser business!!

After doing a bit of knob hunting, I realized that I didn't want to pay $5-10 dollars for just one knob when we needed 8. So with a bit of high-gloss white spray paint, we got some updated knob-age. This was my first time using spray paint and let me tell you, I'm hooked. Not so much on the fumes, but on the instant updated look! They were brass before, but looked porcelain/ceramic after a coat of white. Here was my take...
Then W stepped in with this contraption he made...
Seriously, this guy is the quintessential problem solver! Love him!

Well, she's a real beaut in her home. And will be a dandy, {temporary} changing table in a few months when Boy hangs out in our room before moving to his own. Thank goodness for protective coating and chux pads!

Break Down:
Roller, Tray & Brush Set: $11
Quart of paint: $12
Polyurethane Protective Coat: $14
White spray paint: $3
Sandwiches &  Beer: $15
Total: $55...but $30 for us with a gift card!

Think Grandma will approve?!?

His Bench

{Archive from 4.27.11}

Last week when my parents came over for dinner, W and my dad moved E's unfinished bench upstairs so we could check it out in its natural habitat. The only step left is a final paint coat, but we wanted to make sure it fit in the space we had envisioned for it. I threw some of the pillows I've been gathering on there just to see.
We're still on the fence about whether it's too long or not. We may just cut off the last two cubes on the left and turn them into a night stand, because the thing is long. But I'm really loving the cubbies already which serve as his dresser for now until we get his closet into better organizational shape. His current dresser/changing table will become his brother's.

The three IKEA baskets contain: shirts, shorts/pants, and cloth diaper supplies for now. The road-map rug is also from IKEA. All those hard back Seuss books were my stash from childhood {thank you, Pops, for letting Mom retain some of my childhood belongings.} And the metal airplane is a summer find at a discount store.
I found the awesome orange pillow cases at Walmart for $5.50 last week when I was there for my other current craft project. Did you know they sell individual pieces of bedding sets? So great! These will eventually make way to his bed.You can see some of the wood-filler on the screws--hence the extra coat.
So, there you have it. A very long cubby bench/bookcase that may eventually get chopped down, re-painted and hold different throw pillows once I find some fun fabric....but you get the idea.
W is We are basically half way done with our DIY list for E's room!! Now it's time to finish some textile crafty fun, some spray paint here, wall shelves there, put everything together, teach him to sleep in a big boy bed, and reveal the completed look! Just small things, like that. ;) Then it's onto our master re-do. Oh, and lastly, figure out a nursery set-up for our office/guest room/throw-stuff-in-&-shut-the-door room!! Hoot hoot!

List of Future Projects

{Archive from 4.7.11}

W may or may not now call me a DIYN..."do it yourself nutter." I can definitely see how this can be quite addicting. ;) Ever since finding Ana White's free plans, I'm a bookmarking mad-lady. I'm thinking we could shoot for a big project per month and still get some things done before this baby BOY joins us. EEK! :)

I was talking to my mom about this recently. In all seriousness, I haven't really cared all that much about what went into our house, until now, as along as it was warm, welcoming, and tidy for guests.. I mean, we were really fortunate that so many lovely pieces came from my grandma and parents during their respected moves {assisted living and the re-modeled grandparents' house} to decorate our house, but I didn't really know what I was doing or what my style was. My mom made a good point that now that I'm spending much more of my time at home, I care more about adding more personal touches to it. Now, if only I could harness that motivation for clean, clean, cleaning...oi!

Anyway, here's what DIY projects I've got on my list so far {not counting painting our & E's room}...

1) Definitely the next project, especially since we can re-use most supplies from E's bed project.

We'll pass on the legs and lay it horizontally instead against the window for a window seat/reading area. I'll make a seat cushion, throw pillows and buy some baskets for storage.

2) A friend just re-did a piece of furniture using this amazingly awesome color. I'm hooked and want to update our dresser with it now....in Behr's Lemon Lime
Her beauty--

Our potential--


3) Bookshelves
It's a toss up between these and another style that I've been eyeing for E's big boy room.

4) Update table lamps with spray paint & fabric
I don't know if I could get away with this much girlie-ness but this is my inspiration
It may end up looking similar to this, just different colors/fabric

5) New headboard: I've been talking about wanting a new bed for like 3 years now. I found this great tute on making your own headboard and thought it was a decent start and much more manageable on the budget.
 But, potentially with this fabric...to go with the whole yellow and charcoal theme I'm leaning towards for our master. W thinks this has too much potential for getting dirty, but it's SO cute!

 ... And way down the road when I start thinking about our downstairs...

or
I have to perfect spot for this or this and would really love some hidden storage for E's toys.

...I wonder if they have an DIYA {do it yourself anonymous} group?!...Heh.

Teamwork: Big Boy Bed

{Archive from 4.5.11}

W & I finished our very own first piece of furniture together! And I loved loved loved this project for multiple reasons:
1)Learning so much in the process: because I was so interested, I really learned a ton about the size of lumber, power tools, measuring, construction of a simple shape, upholstery, etc.
2) Teamwork: I really love working side by side with W on projects. Call me crazy, but I could totally work with my hubby. Maybe it's because my parents have owned a small business together for as long as I remember so it's just my normal or because I'm all about spending ample time with him. Either way, it was great fun to work together to create something!
3) It's our very own creation: hopefully one that can be used with all of our future kids. W made sure to take extra steps to secure it's longevity and it would be super easy to re-upholster with new fabric. It's so fun to look at the piece while exclaiming: "We did THAT ourselves!!"
4) Ana White's plans are a.mazing: they include every little thing to help a lay-person build...diagrams, measurements of each piece, pictures, shopping list, cut list, instructions--you name it, she wrote about it. Oh, did I mention it's all free?! I was originally hoping to use this for a window seat, but now I'm going to search Ana's blog to see if I can find plans to match...and saved some moolah!

And so, here it is:

Yup, I completely tossed out the light blue idea and went with an indigo/navy color after finding the perfect duvet fabric. Our local JoAnn's had some pretty slim pickings because it's moving to a bigger store, but I got a sweet discount--I was only a few dollars under my budget but I bought 4 yards instead of the 2 the plans called for because my fabric was 45'', not 60''. I also found some cute light blue stripe fabric that I'll use for pillows. I'm so excited to start making his linens now. We're on the fence about whether to purchase another crib mattress or just buy some foam--I've got to do some price comparison before deciding.

I also painted the legs of the bed with some of our trim paint used in the house. Hoping that will tie the bed into his new room more. When we do his cubby shelf, I hope to also paint it the same color {Snippet of Tannin; Kelly-Moore}

We also haven't decided when to actually try this sucker out. Heh. But we're both thinking early/mid-summer, maybe after we get back from Pennsylvania.

Break-down...
Lumber/Supplies: about $30
Fabric: about $24
Foam {used instead of batting, a trick I learned on another blog}: $15
Total: roughly $70

Not bad for a new upholstered toddler bed...just the way I wanted it!