Wednesday, June 29, 2011

If Ever...

I stumbled upon Under the Sycamore's recent DIY and am definitely putting this idea into the "if ever I'm daring enough to try" file. Because it's simply beautiful! She totally enhanced a Goodwill, Grandma's art collection piece into beauty.

Talk about sophisticated paint by numbers!

Tuesday, June 28, 2011

Seeing Stripes!

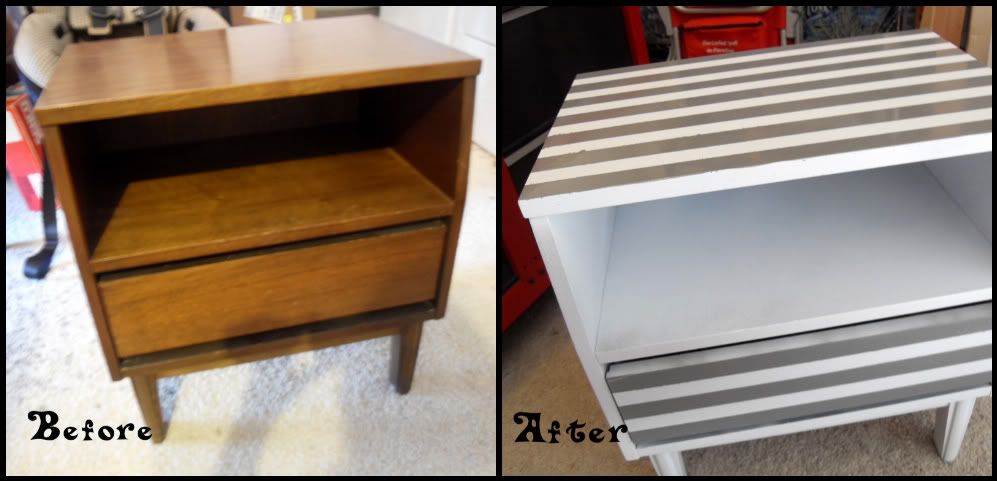
My newest victim got a nice new coat of white and stripes over the weekend.

I was feeling a bit daring so I wanted to try out something new. Being a newbie at all this DIY stuff, I've got a lot to catch up on. I seriously thought about being double-dog daring and going full-steam ahead with some Chevron zig-zags, but then I thought better of it. Can't get too far ahead of my very amateur skills.

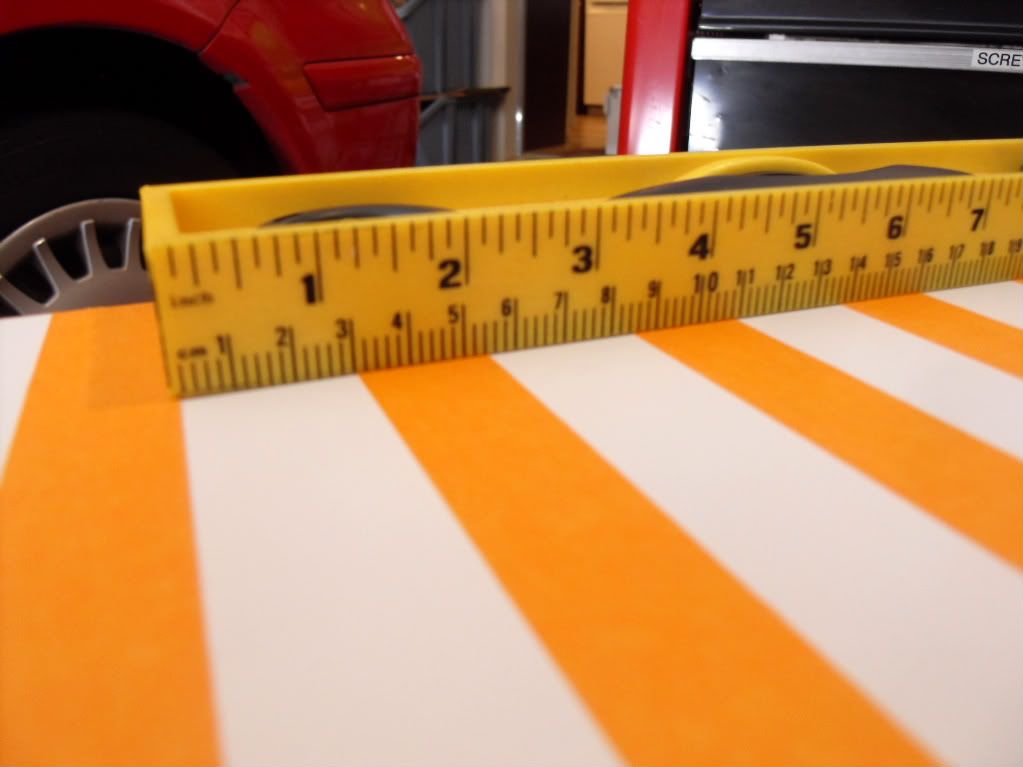
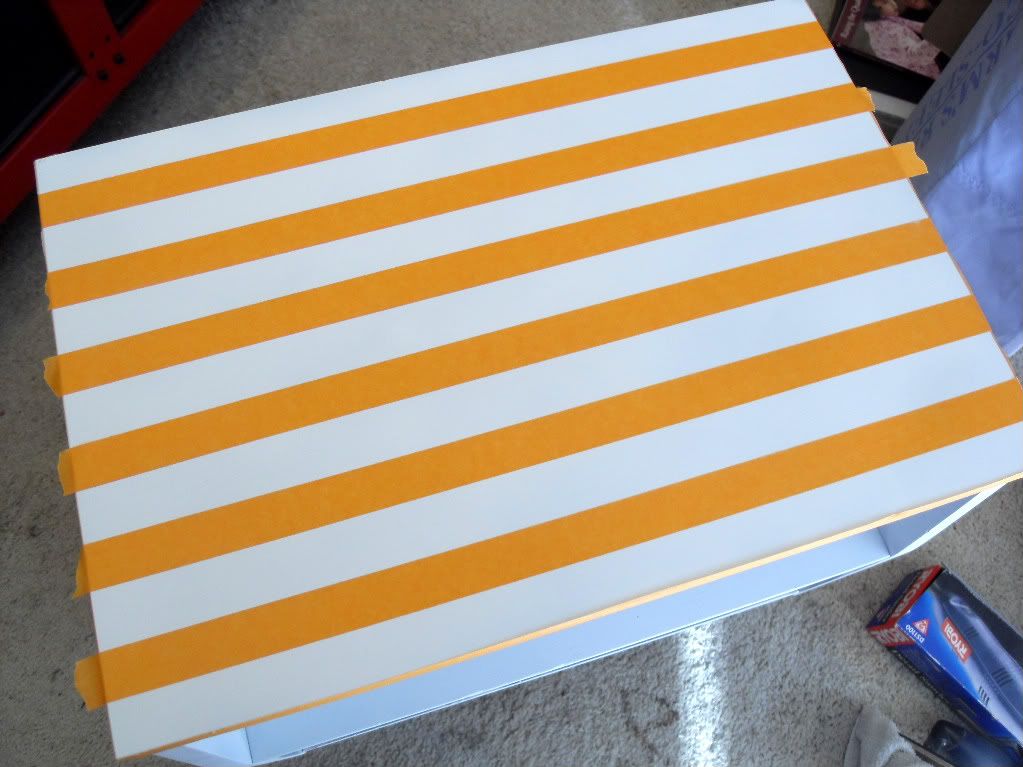
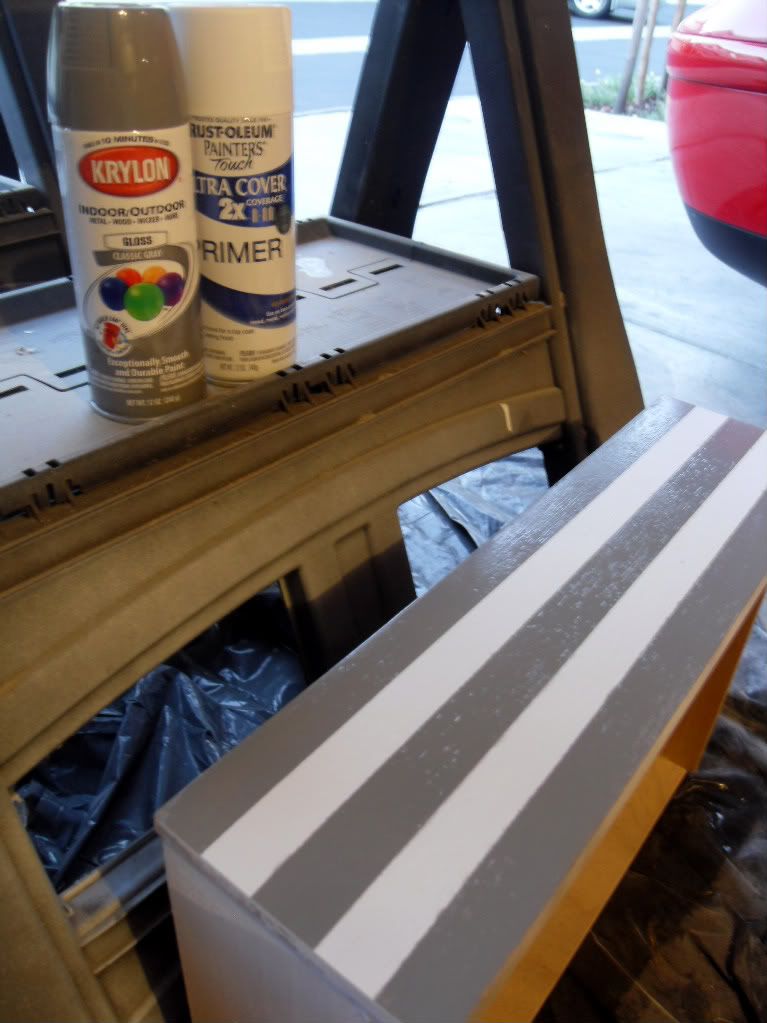
First, I covered my whole piece with white primer. We did do some sanding beforehand, but it's really not necessary when spray painting. After the coats of primer dried, I started in with the stripes. I covered the entire border surrounding my top to make sure no gray got else where. And since the piece was pretty small, I wanted stripes a bit over an inch wide. I pulled out a level and used it as a measuring tool. Then I laid down my tape at each interval, making sure to check both the left and right ends for correct width spacing.
{I left the end-tabs up to make for easy removal after I painted.}

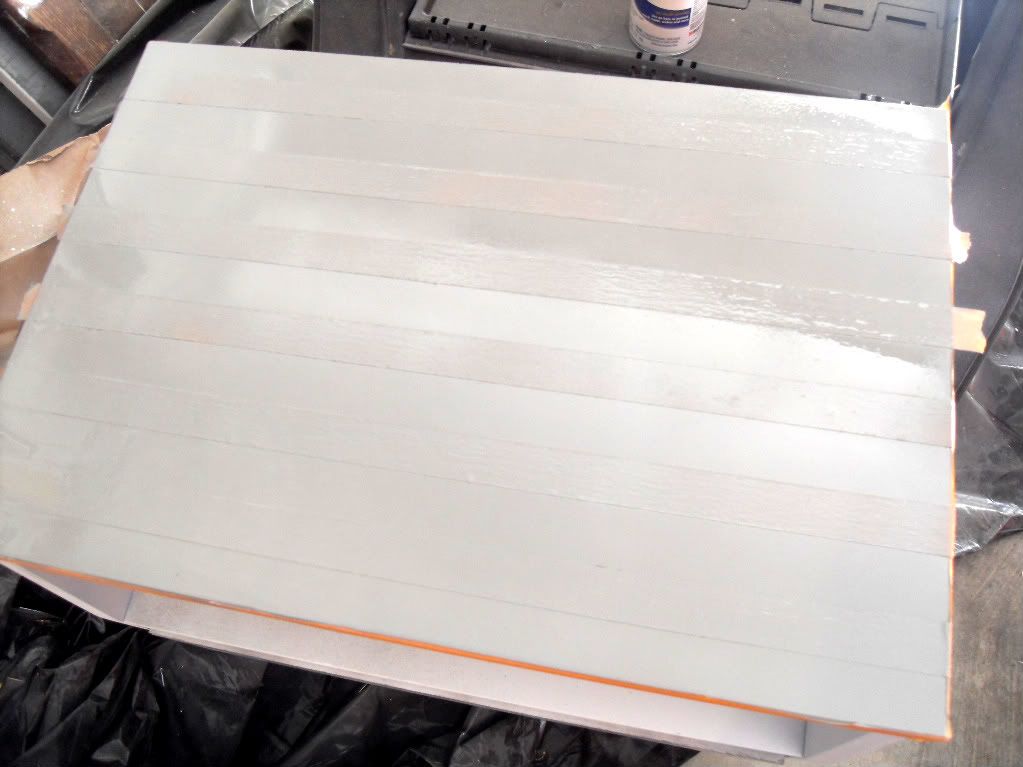
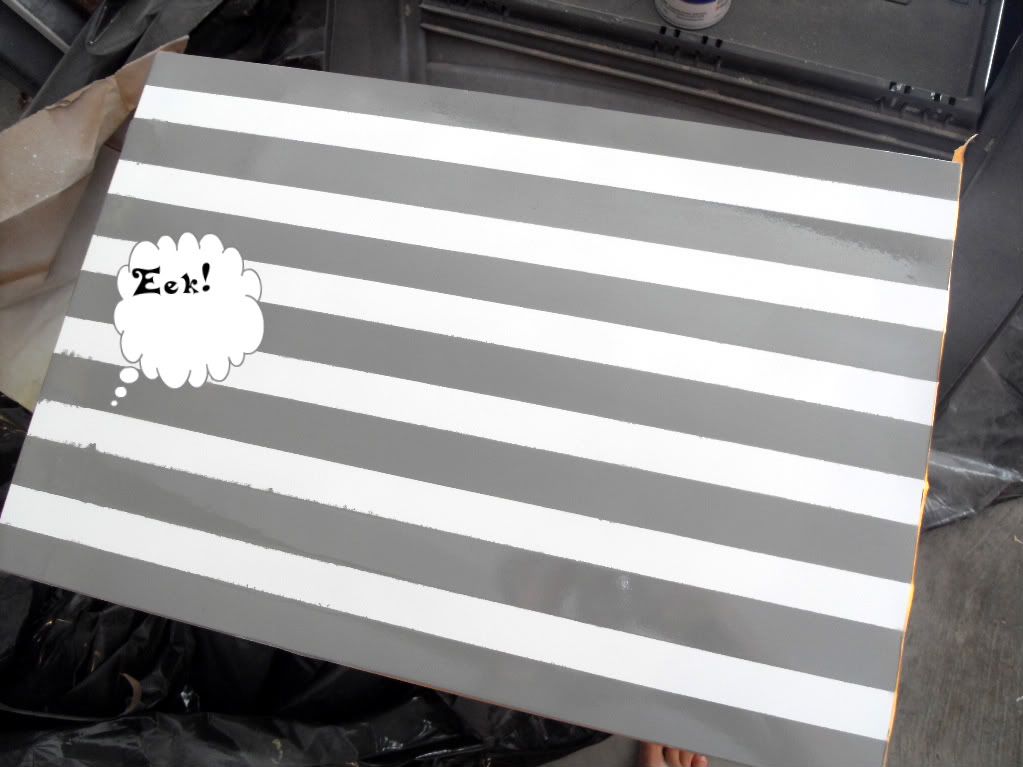
Once the whole top was taped up, I let loose with "classic gray" and covered the entire top with it.
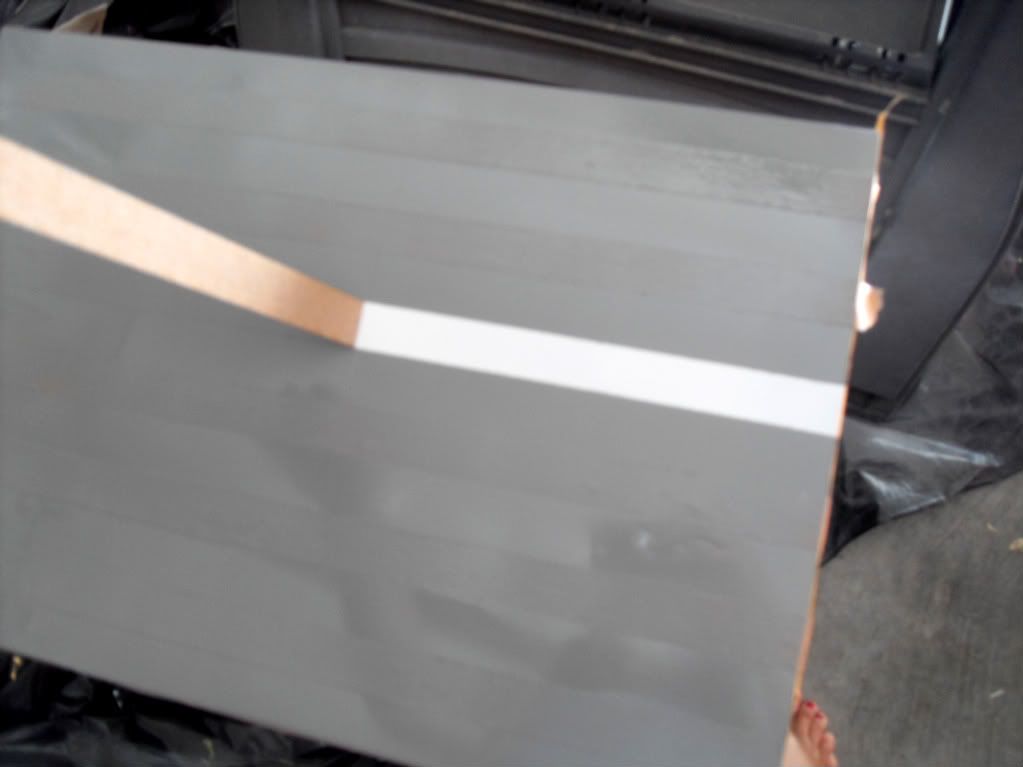
I waited a few seconds then started to peal off my tape. There were a few bleed marks that I had to touch up, even though I made sure to press down on my tape...eh, I'll just chalk it up to me being a newbie. And they were the only thing I can focus on--see what I mean...
To cover the gray run-over, a small paint brush and some white craft paint did the job. I'm sure there must be a more professional method, but I wanted them gone asap and those were the supplies that I had on hand. Worked for me!

I repeated the same steps striping steps on the little drawer but on a much smaller scale and with no bleed-through issues. AND I loving me some stripes! Can't wait to put this in E's room! Such a fun transformation, and one that I did all on my own this time..well, with some helpful teaching and input by W.

To see link-ups, go to bottom of page!

Monday, June 27, 2011

Such a Tease

Someone got a little daring over the weekend...
First time trying out stripes...

And I'm in love! I'll show the reveal tomorrow of victim's newest coat!

Thursday, June 23, 2011

Pantry Plan


The Low Down:
1) Stencils! What I've seen of others' stencil projects are just giving me the itch. This part of the plan is honestly far fetched, but would love to pull off if I can convince the hubbs that this is good use of our limited time. Heh. There is a free Moroccan style stencil that can be found here that I'm drooling over. But I'm open to the adventure of wallpaper too just because the space is small enough to tackle!

2) The House of Smith's redid their pantry and used some beautiful stenciling. This is what I'm talking about. Gorg!

3) This pantry is much on scale with that we have to work with. I really like the door hanging organization too. Could be a better solution than what we've got hanging on there already.

4) Jars for containers. Great upcycling!! We have a wee bit of a Mason jar fetish over here. In fact, they are what we use a our everyday glasses. Break one?! No problem! Rinse out a jar of red sauce and you've got yourself a replacement. I also use them around the house as vases and the larger ones from Costco I've already started to collect to hold our dry beans, lentils and rice.

5) This is actually a craft closet, but I threw it in just to get a better idea of how I could mesh the space for some of my craft supplies. I want to have a few things on hand downstairs so I can craft, but will keep most supplies in the Nursery/Office.

6) Love the Ikea baskets on the bottom of this pantry. These would be a great 'catch all' to hide some of my smaller crafty supplies that make their home downstairs.

So, these are just a few of the ideas running through my mind while I attempt to gather a 'game play' for our little space. It may come as a shock, but W is the more clear and effective communicator of the bunch. By having these visual plans, I can tell him what's floating around in my brain. And that makes our jobs go much smoother!

Wednesday, June 22, 2011

Beware of the Befores

With E's big boy room almost complete {reveal soon, I promise! It's just those dang details like wall decor that slow me down!}, we are ready to start another 'big' project! I think our master will just have to wait and may take a longer 'work in progress' timeline as baby Boy's arrival gets nearer and nearer. {Can you sense the panic yet?!}

There are two areas that are on our TOP PRIORITY list before his entrance into our little world: the pantry and the nursery/office. Does that make it a nurs-office or a offic-ery? Anyway, both places are in horrid status whatever you call it which is why we should probably get them in order asap. Brace yourself, please.

Current Status of Nurs-Office:
W used it mostly when he was finishing up school and we've basically turned it into a "Throw Whatever In and Shut the Door" space since. That includes "Throw Crib and Dresser" in too. The theme already in here is a ol' Western which I may just play into for baby Boy's area. And I'm totally cool with keeping the olive green wall color. Time is short here, people.

Current Status of Pantry:
Absolutely horrible, right? Please tell me we're not the only ones with these dark secret spaces! And it's such a sad, poor use of space! It's a coat closet but is right outside our kitchen area. I'd really love to turn it into a pantry/storage area. Most likely for my craft supplies since most of that gets done at the kitchen table while E plays in the family room.

Check back tomorrow for some positive inspiration boards that are more appealing to the eye!

Tuesday, June 21, 2011

Lighten Up, Why Don't Cha?!

I discovered the beauty of spray paint when I recovered the knobs in our dresser redo. And since then, have been itching to get my hands on something else to re-paint. I bought a slew of colors in our master and E's room color schemes just so I could spray at a moment's notice. Here's what I've been up to lately...

The frames I got for free from the side of a local frame shop. Every once and awhile, when E & I make our weekly walks to the library or bank, I'll find some frames marked 'free' outside the shop. It's one of the perks of our morning walks. ;) The lantern we had already. We have two others that I plan to lighten up after seeing the success with this one.

I removed all glass parts from each item, got my tarps and protective mask on. Then got to work. I wiped down the lantern with a damp cloth to get all the dust off. Next came a swift coat of primer for all pieces.

For the lantern, I picked light blue..."blue ocean breeze" to be exact.

Here it is after a few coats.

After a night of drying, I put back the yellow glass panels and put it on the dresser to have a look-see. Still working on those staging skills...

Two of the frames I painted with "sun yellow" and have an idea in the works that includes hanging them over our headboard!

My painting days have just begun. I still have at least four more frames to paint {that weren't pictured} as well as a few more fixtures that were in our room before, but just need to lighten up a bit to fit back in.

Monday, June 20, 2011

My Next Victim

The Swenson family hit the garage sales this past weekend. I must pause here to lament that we do not have any great thrift stores or discount stores in our area for furniture or home goods. I can get lucky on occasion at Marshall's but it's usually just small decor items. There's a serious lack of big, beautiful furniture pieces waiting to be recovered around here. Or maybe I'm just not looking in the right places?!

Anyway, I was really hoping to strike it rich when a local town was doing a city-wide sale with multiple families participating. Sweet! I wanted to find some potential end tables to fit in with our master redo, but I quickly learned that by having purchasing guidelines, I was also gambling. There was a big possibility of ending the day empty-handed. Win some, lose some, eh?

So, I was really happy to stumble upon this beautiful, mini table that was in a set with dresser. It's not a fit for our master, but I know the perfect little place for it in E's room. This was our only treasure from that morning. But definitely still worth the time, driving, and donuts it took to discover it.
We plan to spray paint it. It's a small enough piece and I already have the colors to choose from. So W will do some sanding and I'll do some spraying...just as soon as I commit to a color! Seriously, the biggest problem I face every project!!

In the meantime, I've been spray painting other items that will go into our master once they liven up a bit...

Happy Monday!

Friday, June 17, 2011

Pallet Statement Art

So I've been eyeing a lot of pallet wall art these days in blogland and on Pinerest. And I'm wanting one myself now. In our master, I think. It's in need of a 'statement' piece to balance out the dresser.

I first saw this over at house*tweaking...

And this week this on young and crafty...

Aren't they so gorgeous?! Both have great, seemingly easy to follow tutorials. And I'm loving that yellow! We still have some left over from our dresser redo. I'm just wondering what word or phrase W and I could use to make it even that more meaningful. Although "Love" works just as well in our master. ;) Brain wheels turning...

My love for pallets started when we were originally loving this idea for E's window seat bench. We went with the Ikea version instead because it just fit our space better. His room didn't have any 'good' corners to fit this fun nook in.
But from that short period of thinking we could, W hunted down several local sources for free pallets via Craigslist. Don't do Home Depot or Lowe's--we stopped at both and they charge ya!

While I'd love a piece like this to hang over our bed, I'm not too keen on having a huge chunk of wood over our heads here in earthquake country. So I'm thinking this space near our chair, W's guitar, and the windows should suffice...

Here's some other pallet inspiration I've seen...

If only I had some mad free-handed skills like this!

Check out 13 DIY pallet projects here, including these shelves.

And this reading bed found in this nursery.

The possibilities for upcycling these rustic pieces of wood are endless!

***Edited to add***
 I've finally joined in the pallet art club. Post here on my "rise & shine" piece.

Thursday, June 16, 2011

How to Decorate Series

I stumbled upon House Stories A to Z just in time for her June series for DIY'ers. Some great advice, pictures, and ideas can be found over here--including the recent and inspiring "decorating with furniture".
Definitely worth your time to explore these posts!

Wednesday, June 15, 2011

Hanging Tent: The Saga

Unfortunately, this craft was an utter bit of an agony for me so I was happy to finally shake my hands of it. Every tutorial and the comments of whom made one said this was easy. Which was not true for the construction or gathering of materials! Or at least I made it difficult for myself.

Remember this picture? Well, I went from this...
to this...
The inside:
But the dang thing took almost TWO months to complete! Most supplies from this came from Walmart....which reminded me why I don't like shopping at Walmart. The only supplies I had to get were:
 -1 Twin flat sheet {I returned the other two in the picture above}
-Hula Hoop
 
Well, if you want to make one yourself, make sure not to get fitted sheets. Because then you'll have to go back, switch 'em out, and wait in the checkout line again. Also, try not to forget your wallet. Because they don't like to hold items for longer than 30 minutes. So, you go all the way back home, grab said wallet, and rush back. Not that I speak from experience. And last piece of advice, make sure to not buy the hula hoop filled water. Because then you'll have to make yet another trip to Walmart. Apparently, it's really hard to get just a plain ol' hula hoop these days.

So, back to the actual craft...I  used one flat sheet for the base of the tent. And scrap felt for the flags {an idea stolen from here}. The top of the tent is scraps from his bedding and fabric I got from Joann's. I just kind of meshed all the tutorials {here, here, and here} that I liked and then using some math {you know, like circumference, pi, division.. all that} to make my own. I learned I'm not quite emotionally ready to leave the safe haven of tutorials and venture on my own just yet. ;)

It started with three attempts of the top triangles before success. Math fail #1. Then I had my {then} sick hubby to help me put the top and bottom together to see how it would work. He's so sweet to indulge me.
See that big open space?? Not suppose to be there. The sheet was suppose to wrap all the way around the hula hoop. Math fail #2. I had to go back to Joann's two separate times for more felt and fabric. Then one more time to get more thread {Thanks, Stef!}. Yeesh!

But it fits perfectly into his room and E loves it, thank goodness! He's still a bit young for pretend play, but loved sitting and reading with Papa. I still have to iron the thing out after all my crumpling and stashing from the months it patronized me. I also want to sew some pockets on.
 But for now, I'm just going to appreciate it hanging in his room until I can muster up some more motivation to touch the darn thing.

Break Down
Hula Hoop {$8}
Flat Sheet {$5}
Fabric and felt {$10}
Thread {$2}
Total Cost: $25

Tuesday, June 14, 2011

Big Boy Accents For Big Boy Room

{Archive 3.15.11}

So I've started to put together some ideas for E's big boy room. Lots of bookmarked tutorials and plans. Probably shouldn't admit this because I'm going against the grain here, but I'm not really one for themed rooms. Don't get me wrong, I've seen some really cute rooms using themes that I've loved, but I honestly can never decide on just one thing. It would drive me crazy to narrow my options...which others may find freeing: to have a specific idea in mind. I'm just weird, I guess. This is also probably why I could never get a tattoo--too much commitment to one piece of art! Instead, I plan to stick with some main colors to bring some cohesiveness to his room, and run wild with the other stuff.

While surfing the net, I fell in love with this idea from kojodesigns. Not so much for the ruffles but the use of old books for decor. The following day I found four perfectly old-fashioned looking books at a garage sale. Fabulous!

But I was still stuck on what to do with a ruffle-replacement. Then I was at Michael's in the dollar section and found these perfect white letter hooks. I was bummed that there was no "Z'' to spell his name so I opted for next the obvious word...
{Thanks to my friend, Erin, for picking up a few letters for me! Getting all the letters required a bit of a hunt...}

All I did was hot glue the letters onto the front of the books and followed the tutorial for keeping the books closed and prepping to hang.
{E for easiest project. EVER.}

I hope to hang these on the wall near a reading nook or ledge. And I'm just excited that E will have some classics as part of his big boy room!
{Pride And Prejudice...One of my favorite love stories.}

Break Down:
Letters: $4 ($1 a piece)
Books: $6 ($1.50 a piece)
Total: $10 wall decor...sweet!


More on his room as it develops...

Craft Your Heart Out!

{Archive 2.22.11}

Yup. That's exactly what I did all day yesterday with my girlfriend, Erin. Craft. All.Day.Long. It was fabulous! E put in a great marathon morning nap so we completed 3 headbands and 3/4 of a bib necklace
headband tutorials used: victorian lace and button.
Then we headed back to the craft store when we discovered we needed more supplies. E was back down for an afternoon nap, and we finished the rest of the projects. Lovely. And I just have to say that Erin seriously came out of the craft closet. She was a complete natural and within two projects, was already going rogue. I was way impressed with her mad skills. 
Only negative from the day was that I was waaaay too pooped to finish my sewing project that evening. But so worth it to delay another day for such an awesome craft date!

W thought our loot was pretty rockin' too.

Monday, June 13, 2011

Rain Gutter Bookshelves

So I came across this idea {from here and here} who knows how long ago and bookmarked it. E was just a baby at the time, but I knew I wanted to it in his big boy room. It's a super cheap project which we made a bit cheaper by skipping a few materials. And of course, after being a teacher, I was all over the benefits! The idea behind them is that kids will be more encouraged to pick and chose books off the shelves because they can see the front cover. Really, it just makes the books that much more accessible to them.

And let's be honest, I'm hoping for some additional sleep once he gets trained the hang of waking up and grabbing a book to read on his own. Plus, I love the added bonus that it's an unexpected element; using unusual material for part of his room. 

Materials:
One 10 inch vinyl rain gutter {K frame style}
Six gutter end caps {2 per shelf}
Hack saw or table saw {to cut the gutter into shelves}
Drill {to mount them to the wall}
Total Cost: $22

We skipped:
The brackets {2 per each shelf; they aren't really that necessary if you mount on the wall studs}
Dry wall screws {we used some of our leftover 2.5 inchers}


What W We Did:
1. Cut the gutter to desired length {I wanted three shelves; 3 and 1/3 feet each}
2. Add end caps to gutters
3. Find studs and measure out your distance between shelves
4. Have one person hold shelf and level as the other person drills in one screw through each end of the shelf...this is where I came in.
5. Repeat for each shelf
6. Sneak some fun in
7. Fill shelves with books--we made sure to keep the shelves pretty low. E can reach the bottom two shelves now. Each shelf holds between 10-15 books. I made sure the top shelf was still a bit too high and stuck his 'nicer' books on that for now.
8. Admire and start reading!