Showing posts with label build it. Show all posts

Monday, November 5, 2012

Gallery Shelves {DIY}

Our master bedroom has been a work in progress for what seems like FOREVER. It was re-painted well over a year ago, and every since, we've been slowly changing things out or updating them. The most recent addition has been some gallery shelves that W whipped up a few evenings ago. 

You can buy these from Pottery Barn for the hefty price of $55 but that would only get you one 4-foot ledge when I wanted two five-foot ones. Instead, we used Ana White's plans for these..she calls them the "$10 shelves" since that's how much the wood costs to make these. We just used pallet wood that we already had so they were free! Yay! Favorite price. They're basically just three pieces of wood nailed together. Super easy to make in a single night and very easily custom size-able.
So W built, I painted {high gloss white; 2 coats}, he hung, and I filled 'em with this and that from around the house/garage to have a look-see.

And so they sit above our yellow dresser,

where I can enjoy more memories from my bed! Yay for fewer blank walls!
Time for some more gushy, lovey dovey, romantic prints and pictures, no?!?!

Thursday, August 16, 2012

Rise & Shine {Pallet Art}

Mmmmkay, so I know how I mentioned here that I was working on a piece?! Way back in MARCH?! So, that piece. I didn't really love it. It took up the dining table for way too long since I just couldn't get to finishing it. I was forced to move it into the garage where it was abandoned. Until last week. 

Leave it to crafty inspiration or whatever, I lugged my big pallet canvas back into the house one night and just got to work. I actually already had some words stenciled on it so I had to work around those and cover them as I went. I was inspired by this google image...

With some frog tape, sponge brush and craft paint, I just went for it. Most of it was free hand and I worked pretty quickly through it. No lolly-gagging this time. I just wanted to create something and finish it. Well most of it.

I used the cricut machine to make stencils for the "Rise & Shine" then painted those on a few days later.

 W hung it up with some screws, wire and a heavy weight picture hook.

Ta-da!
This is what it was meant to be...right?! It's such a fun bright piece that lightens up our downstairs!

It looked a little lonely up there so I added something else. Excited with my version of the "pallet art madness" trend!

Rise and shine and give God the glory!

Wednesday, March 14, 2012

One Thing Leads to Another

I scored some free pallets about a month ago that have been sitting in our garage since. They were waiting for me to pick something from all the great projects out there. Then I was inspired, not by pinterest, but by a window display while on a walk through our local downtown. Yay for seeing it in the real world! I had W create a pallet canvas of sorts by showing him this tutorial and then off he went to make his own version. 

While in the process of finishing the project, I was stumped on how to get my words onto the wood. Mod-Podge? Wood glue? Stencil? Craft paint? Free hand? I was at a loss so I decided to test a few of them....which actually turned into a whole new project that I'm sharing now. Distracted much! {More on the original pallet art later.} For now, it's on to this side project...
I started with Mod-Podge because it seemed the easiest. I got out three extra boards that W had left over from the original, cut some words out using my mom's cricut, and tried it out.
 I found out that the glue changed the color of the wood, even after it dried, so I covered the entire board with the stuff. Then I placed my letters out and covered it with a second coat.
It was super easy and I loved the mod-podged wood better--it looks so rich!
{before+after}

 While deciding on the phrase, I had an up-coming bridal shower I'm co-hosting in mind. I'm actually hoping to turn these wood planks into a wooden sign post and after the party, eventually put it out in our backyard. Hurray for multi-use pieces!!

Wednesday, January 4, 2012

Tree Stump Table {Crunchy Decor}

I saw this pin this week and had to laugh...

Because W seriously just completed the exact same idea! {well, without the stain, finish and legs} Last month, during our downstairs purge and furniture re-arranging, we took out our coffee table. It was just getting in the way of E's play and we were ready to get rid of it. But, we were seriously lacking places to put our tea {and well, this is winter afterall and tea is a regular thing in this household for all three of us}.
So W's amazing DIY solution? Tree stump tables. He made two. How? I don't know. You'll have to ask him. It was a project he did entirely by himself. But I love the results. They are small, easily move out of the way when we don't need them, and very rustic. 

After reading this tutorial, I may ask him to finish off the pieces. Although, I do really dig the more natural look. Like it's fresh out of the forest.What do you think?

Tuesday, August 2, 2011

Still Waiting On Me

Over the weekend, W and I did some awesomely-massive-long-overdue cleaning. Did I mention it was awesome? Nothing like having dinner guests over to get the ball rolling on tidying up. It was made clear that it's been way too long since we've invited anyone over. But we got a lot done and even had time for some R & R too. Bonus!

After deep-cleaning the fridge with me, W got to work on our pantry shelving! Finally, some positive pantry progress..heh.

First project using his new jig-saw; Father's Day gift!
W went with a sort of 'block C' shape for easier access to stuff in the back. This pantry is actually a coat closet so there isn't not much space to move around in.
I helped him prime and paint the shelves with our leftover trim; Snippet of Tannin. One of our quickest building projects ever.
So, they are totally finished and ready for installation...which leaves the rest of the work up to me.

Perhaps it's all the cleaning motivation that has me even attempting this...
Making my own stencil?!

When people say it's long and tedious, they are absolutely, one hundred percent correct. And I haven't even started the paint part of it yet. It's still too early to tell if I'll give up or see this crazy idea through. You may never see a tutorial for this. :) Let's just say the chevron pattern is looking like a mighty fine alternative right about now....

This week's goals? Head to store for a small foam roller to try this puppy out as well as get supplies for some of the nursery decor projects.

Did I mention our due date now less than a month away? Can we really get these two spaces done in time??

Monday, July 11, 2011

Upgraded to Big Boy {Room Reveal}

Mmmmkay, I'm officially back from vacation! After needing two days of recovery plus the weekend, I'd like to say that I'm finally caught up on life as much as normal {not saying much} and am putting the pieces back together. It's amazing what traveling across country with an 18 month old, 3 hours time change, and being 32 weeks pregnant can do for needed recovery time! Thanks for sticking around!!

E's big boy room is officially done! Okay, I still have some pictures I want to hang, but the stores I've stopped at for frames have been out of stock. And I'm still on the hunt in my storage boxes for some clear fishing string to hang his airplane. Minor details that I'm too impatient to wait for.  :)

This weekend we did the last bit of hanging and have finally moved onto the nurs-office room. Which reminds me, I still need to finish that visual plan! We've been gathering all our crap old treasures for our up-coming neighborhood garage sale so it's finally put a fire under our butts to get going! That and we only have like 2 months before we have a new baby!

I didn't really do proper 'before' pictures {DIY fail} since I never really did a nursery reveal, but here are a few that I have.

A quick reminder of what my vision was for the room, at the very start...way back in like, March:
I'm still quite amazed that we stuck so closely to the inspiration board. I'm a huge fan of these now because as you know, I'm hugely indecisive. Making this really helped set the vision, and gave me the confidence when making hard decisions with so many good choices! Think the only major digression was making navy a dominate colors.

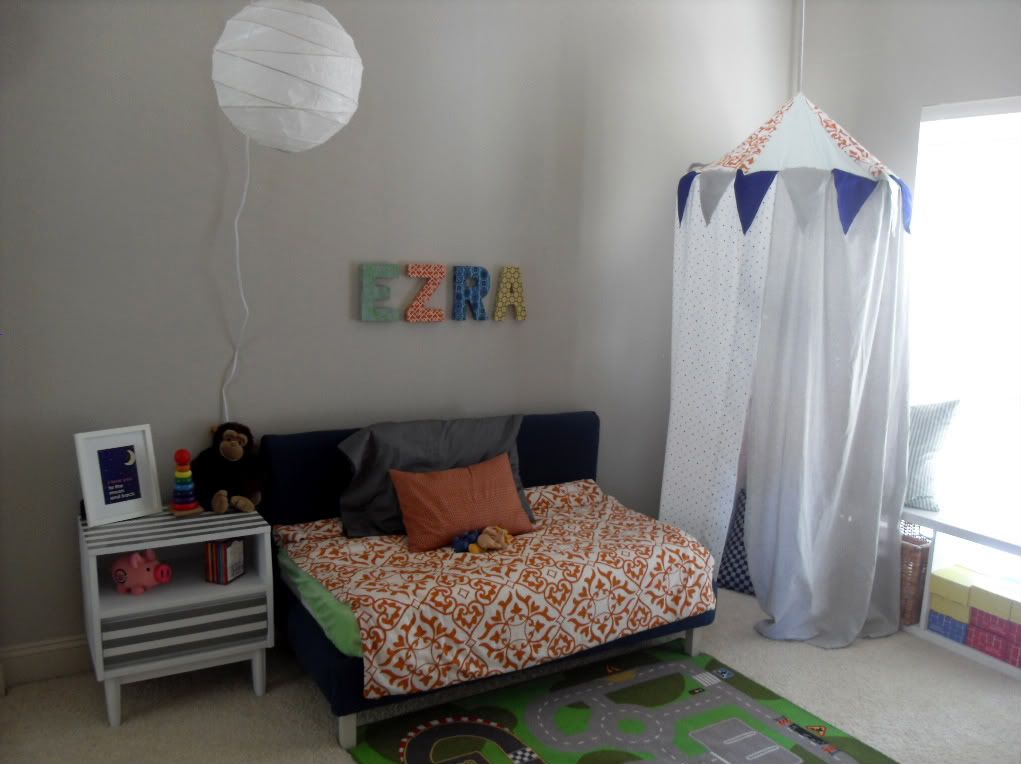
So, without further ado, here's Ezra's big boy room in all its glory!

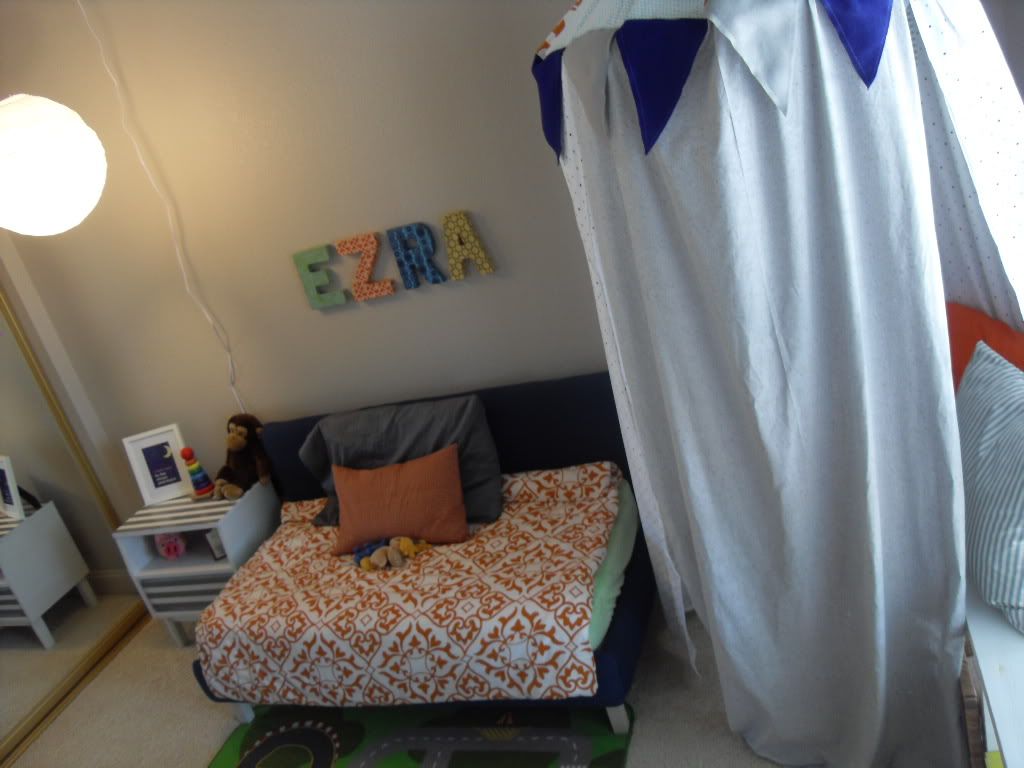
We hung his fabric covered letter with Velcro squares. And hung a lamp from the ceiling.

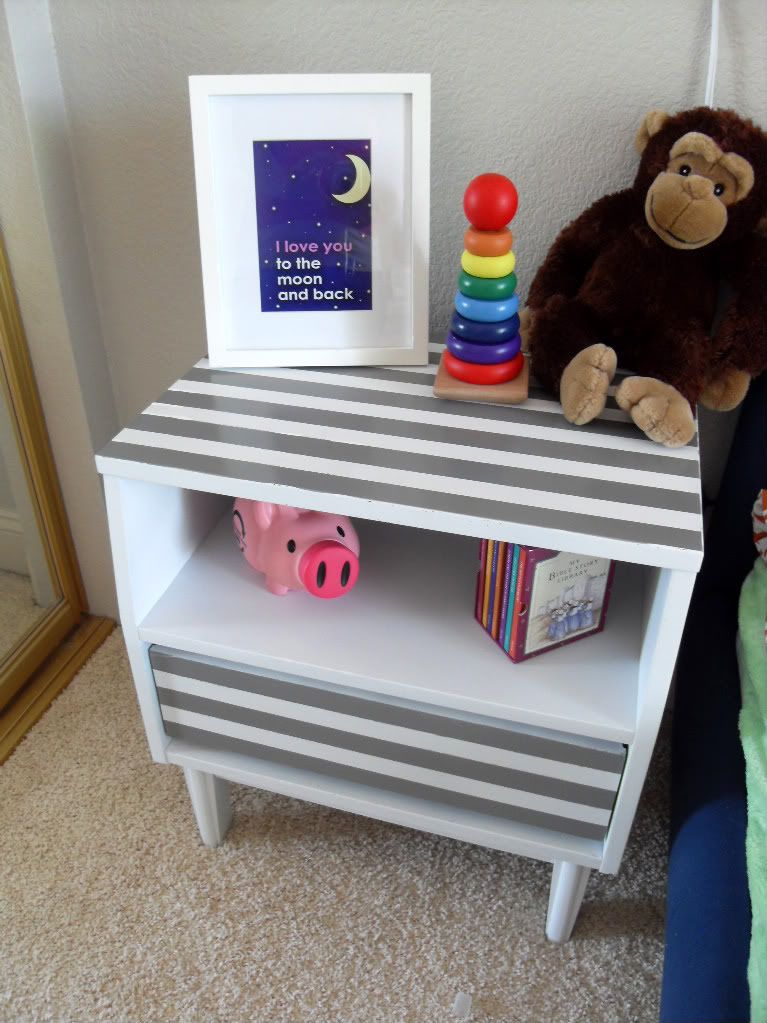
My striped project proved to be the perfect nightstand for Ezra's bedside. For now, the drawer holds some puzzles and musical instruments. I'm sure he'll be storing his little treasures in there in no time.
 
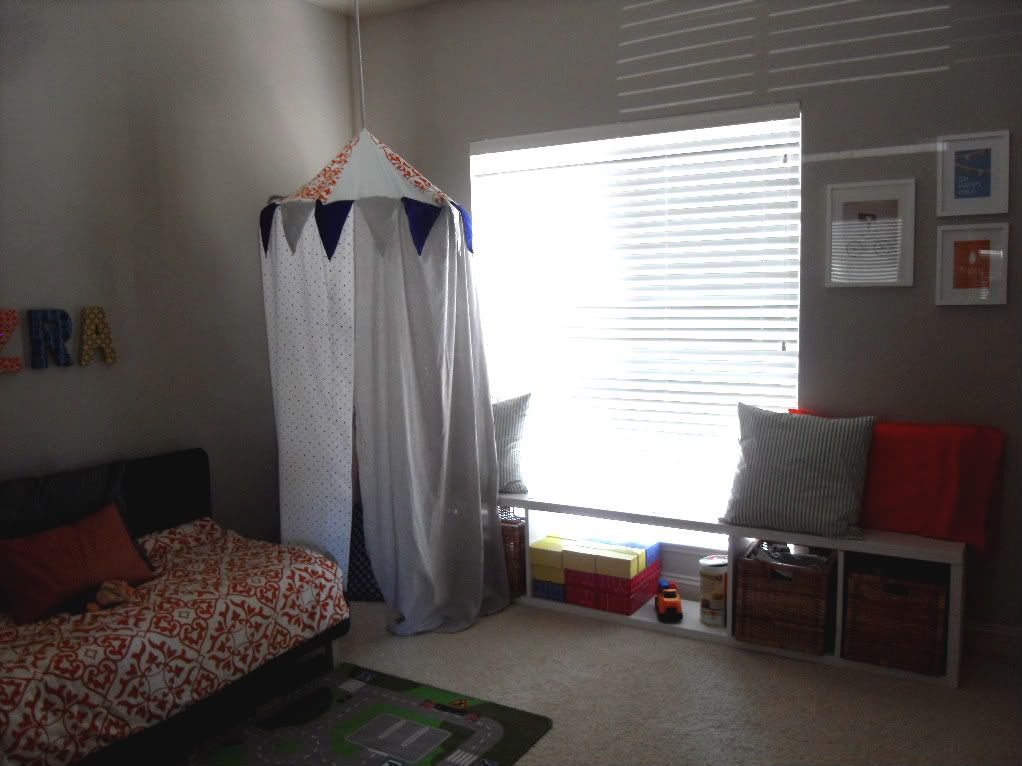
I love that this room gets SO much natural light, but my camera is lame so this is the best I could get of his window wall...ick!

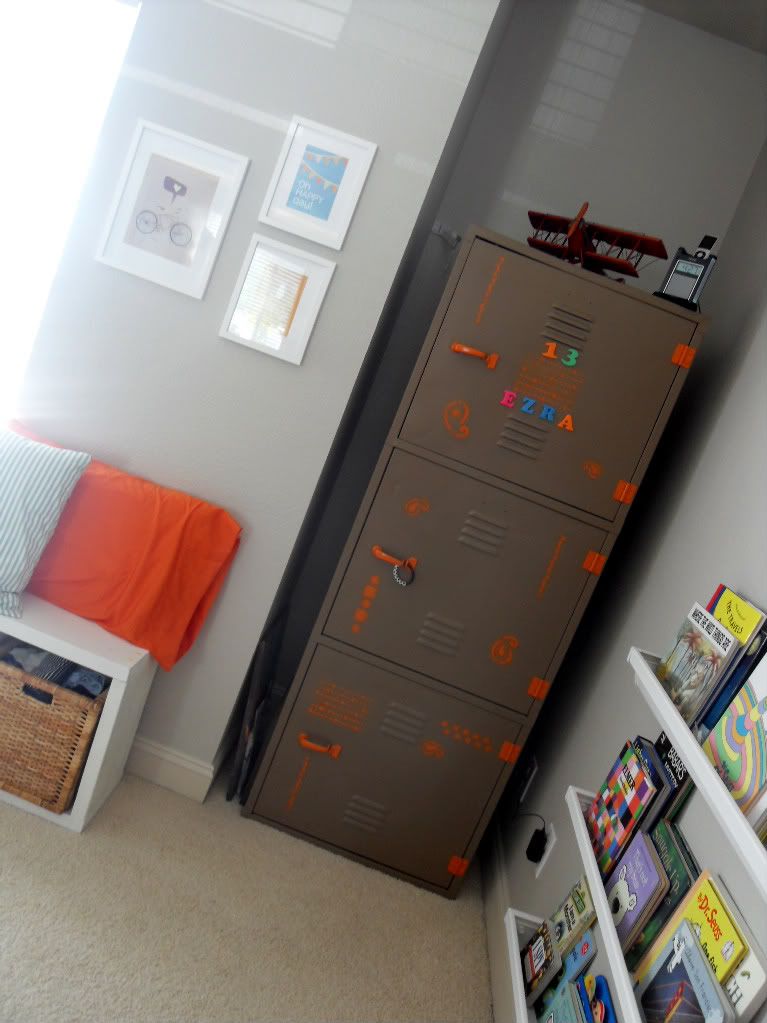
That's the airplane that will be hung over his locker. The top also holds his sound machine that we still use.

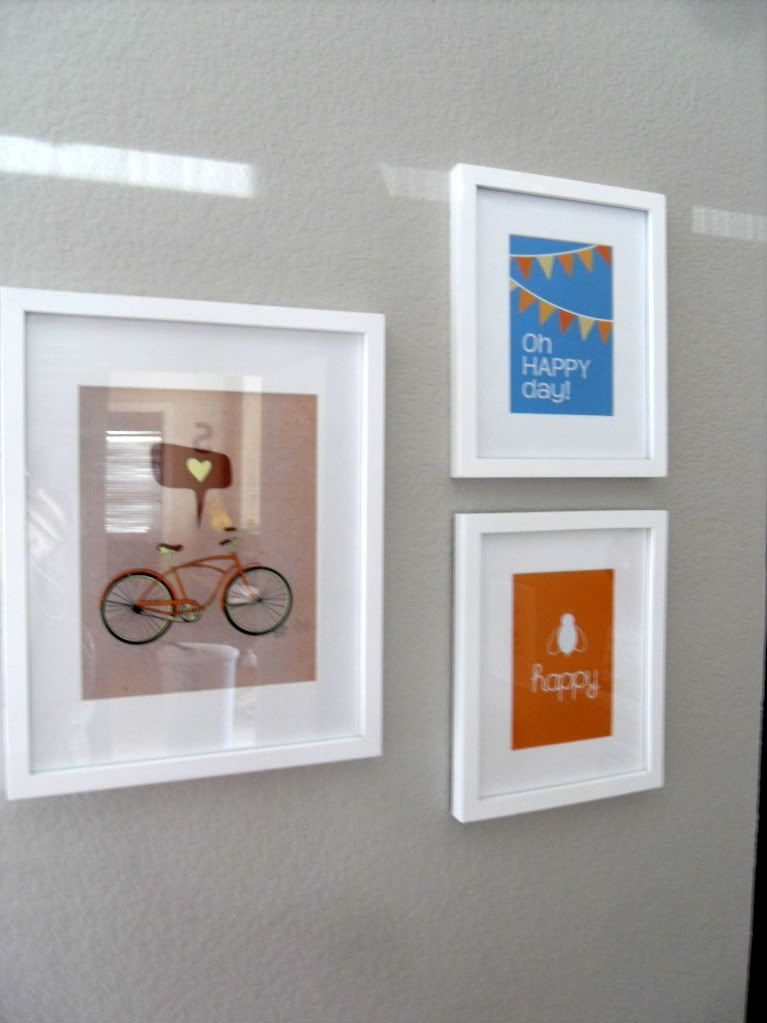
 A few prints that I fell in love with and that incorporate his current obsession as well as the color scheme.

We hung the 'read' over the gutter shelves and I put his recently acquired fireman hat there for now. Ezra totally fell in love with his little table set the moment we put it up. He actually likes sitting there to flip through books and points to the other chair for us to sit.

Another print by the same artist as well as some mood lighting. When I saw this delightful little orange ball lamp at Ikea, I just couldn't pass it up!

And there you have it. A little toddler room that can hopefully spur on the love of reading and a vivid, playful imagination.

Sources
Wall Paint: Martha Stewart's Sharky Gray {seriously, want to paint my whole house in this color now.}
Window seat: DIY
Baskets for storage in window seat: Ikea
Fabric for window pillows: Joanns, Antique thrift store, and Walmart pillow cases
Toddler Bed: DIY, fabric: Joanns
Bedding: DIY; fabric: antique thrift store
Bed pillow fabric: Walmart pillow case, Joanns
Chinese Lantern: CostPlus
Fabric Covered Letters: DIY
Rug: Ikea
Nightstand: DIY, garage sale find
Hanging Tent: DIY
Locker: DIY
Airplane: Ross
Gutter bookshelves: DIY
Table and chairs: Ikea
Orange Lamp: Ikea
READ sign: DIY
 Book print: Etsy
Bike print: Etsy
Moon, Bee Happy & Happy Day prints: found for free online...still looking for those links...
Frames: Walmart

Holy Moly, Batman!! That's a heck of a lot of D-I-Y letters. I totally didn't realize all that we have accomplished. No wonder this has been in the works for several months now! But I can say that we are both super proud and astonished by all that we did together. I honestly never knew we had it in us! We really didn't start this whole fun 'doing-it-yourself' hobby until almost a year and a half ago when W redid a free locker on the side of our road. So, if we can do it, so can YOU!

{linking up below}

Friday, June 17, 2011

Pallet Statement Art

So I've been eyeing a lot of pallet wall art these days in blogland and on Pinerest. And I'm wanting one myself now. In our master, I think. It's in need of a 'statement' piece to balance out the dresser.

I first saw this over at house*tweaking...

And this week this on young and crafty...

Aren't they so gorgeous?! Both have great, seemingly easy to follow tutorials. And I'm loving that yellow! We still have some left over from our dresser redo. I'm just wondering what word or phrase W and I could use to make it even that more meaningful. Although "Love" works just as well in our master. ;) Brain wheels turning...

My love for pallets started when we were originally loving this idea for E's window seat bench. We went with the Ikea version instead because it just fit our space better. His room didn't have any 'good' corners to fit this fun nook in.
But from that short period of thinking we could, W hunted down several local sources for free pallets via Craigslist. Don't do Home Depot or Lowe's--we stopped at both and they charge ya!

While I'd love a piece like this to hang over our bed, I'm not too keen on having a huge chunk of wood over our heads here in earthquake country. So I'm thinking this space near our chair, W's guitar, and the windows should suffice...

Here's some other pallet inspiration I've seen...

If only I had some mad free-handed skills like this!

Check out 13 DIY pallet projects here, including these shelves.

And this reading bed found in this nursery.

The possibilities for upcycling these rustic pieces of wood are endless!

***Edited to add***
 I've finally joined in the pallet art club. Post here on my "rise & shine" piece.

Monday, June 13, 2011

Rain Gutter Bookshelves

So I came across this idea {from here and here} who knows how long ago and bookmarked it. E was just a baby at the time, but I knew I wanted to it in his big boy room. It's a super cheap project which we made a bit cheaper by skipping a few materials. And of course, after being a teacher, I was all over the benefits! The idea behind them is that kids will be more encouraged to pick and chose books off the shelves because they can see the front cover. Really, it just makes the books that much more accessible to them.

And let's be honest, I'm hoping for some additional sleep once he gets trained the hang of waking up and grabbing a book to read on his own. Plus, I love the added bonus that it's an unexpected element; using unusual material for part of his room. 

Materials:
One 10 inch vinyl rain gutter {K frame style}
Six gutter end caps {2 per shelf}
Hack saw or table saw {to cut the gutter into shelves}
Drill {to mount them to the wall}
Total Cost: $22

We skipped:
The brackets {2 per each shelf; they aren't really that necessary if you mount on the wall studs}
Dry wall screws {we used some of our leftover 2.5 inchers}


What W We Did:
1. Cut the gutter to desired length {I wanted three shelves; 3 and 1/3 feet each}
2. Add end caps to gutters
3. Find studs and measure out your distance between shelves
4. Have one person hold shelf and level as the other person drills in one screw through each end of the shelf...this is where I came in.
5. Repeat for each shelf
6. Sneak some fun in
7. Fill shelves with books--we made sure to keep the shelves pretty low. E can reach the bottom two shelves now. Each shelf holds between 10-15 books. I made sure the top shelf was still a bit too high and stuck his 'nicer' books on that for now.
8. Admire and start reading!