Showing posts with label halloween. Show all posts

Thursday, October 31, 2013

Happy Halloween 2013

From the Avengers!

Seriously, these two were WAY too excited for gparent day and showing off their costumes at gymnasitcs. Not interested is keeping still for a civilian photo-opp. Gotta take what you can get with these heroes. ;)
We're doing our usual tricking-n-treating with our besties in the next town over this evening. And yes, this year: no homemade costumes. The boys have continued to come home from gparent day with a different costume over the weeks and have been so excited about their dress-up collection that I decided to KISS {Keep It Simple, Stupid.} ;) No need to stress about something if they're content with what they've got. Looking forward to celebrating with our little gang this evening! 


Hope you enjoy yours with yours!! 

xoxo,
swenson gang

Monday, October 21, 2013

Holiday Boutique


Over this past weekend, I participated in my very first craft selling boutique. It was also the weekend of an amazing block birthday party that included a whole roasted pig, jump house, and beer on tap. Annnnnd the stomach flu for the boys. Seriously, never a dull moment.
I had several reinforcements throughout the weekend to help: my mom, dad, and neighbor {who sold some cards too}. W stopped by throughout the weekend to bring me things I had forgotten at home, feed me, or take/bring back V. I'm so glad it happened so close to home.
My table neighbors were fabulous and sweet. Of course, Juju was the highlight for everyone. If I came without her, everyone would ask where she was. I was never short of arms to hold her while I ran to the bathroom, ate lunch, or needed to sit. It really was a blessing to have so many sweet and gracious women around. 

Another highlight was meeting and exceeding my costs for the experience. Meeting cost was the goal I set out for myself since I had no clue what to expect. I was so excited to get two custom orders while there too. One for a bridal shower that was happening Sunday afternoon. I made it over the night and she picked it up on Sunday morning. 
On the flip side, I seemed to have brought the majority of my traffic. Most of those that purchased from me, I already knew. So I'm not sure if I really needed the boutique other than to have a place to set up shop. I also had plenty of inquiries from strangers on whether I had an online shop. Still have my work cut out for me.  I had a blast, loved trying it out, but with a full weekend away from my family, I'm not sure if I'll do it again. Perhaps, I'll do a virtual store-front first?! 

A GIANT thank you for everyone who encouraged from both near and far. And to my family who supported me through time and energy! This was certainly NOT a one-woman show. ;)

Thursday, November 1, 2012

Wizard of Oz Gang {Halloween Recap}

Last year, the boys were MacGyver and his side-kick, the Swiss Army knife. This year I decided we should all be involved in the fun..you know, make it a family event. This may be the last time I really get away with "picking" since E is already shouting out opinions for next year...which all include a sword and shield.

So for one girl {albeit quite pregnant} and three boys, I went with the Wizard of Oz gang. I had originally planned to make/piece together all of the costumes in some form or fashion. But when my mom gave me a toddler lion costume that she bought from Costco, I didn't turn her away. Here's a bit of the break down for the rest of the gang...

The tin {toddler} man
 Much of his ensemble he already owned: shoes, hoodie {we went with a gray long sleeve for the actual day}, and pants. I made a heart out of red felt, embroidered "if i only had a..." on the front, stuffed it, and safety-pinned it to his top. I bought a huge funnel at a local hardware store along with some chrome spray paint. It originally was tied with jute string but kept falling off so I switched it out to thin elastic. That did the trick and he kept the hat on for the entire night. 

The axe is made from gray and brown felt and stuffed. I free-handed a pattern which worked great. The biggest problem came with making it stand up straight..that's where W came in. He added some cardboard and a skewer to reinforce the structure. Perfect...well, enough to hold up to a wild toddler hacking at air.

 I added a bit of silver face paint to boot.
{this was pre-elastic..he was pretty bummed that it kept falling off}

Knocked-up Dorothy
 I found a really simple and easy tutorial here {she's not the most UN-annoying person ever} which I just sewed instead of using the fabric glue she did. It's basically a skirt and a bib piece tucked into the skirt. I also used her glitter shoe tute in the video too. Since my gingham fabric was really see-through, I added a white lining. And I had zero petticoat luck at the thrift stores so I added some lace trim. 

I really wanted to add that red tulle underneath too and have it just peek out a little. But I didn't find a tutorial that was workable enough and simply ran out of time {and energy}.

I made an over-sized red bow with felt and leftover gingham since pigtails & pregnant felt way too wrong. ;) Threw on some of W's long socks, a red cardi and I was ready to roll.

The scarecrow

W already had everything but the hat and corn cob pipe. Both of which I picked up at the party store while getting face paint. My MIL had made the brown pants over ten years ago for a Renaissance fair and his shirt was thrifted for the same event. His was the easiest!

After pictures with my parents, we headed over to our friends' neighborhood for trick-or-treating. We did much better than the three houses from last year although we were up way past the boys' bedtime.
 
It really felt like E's first year this time. We practiced what to say each time and that kid said "Happy Halloween" or "Thank You" with so much gusto at every house. As he trotted back, he'd give me his candy and announce how many pieces he got. If he got more than two, he'd say, "It's because I'm a lucky, lucky, lucky little boy." A movie reference we use often with him. Love that boy so.

the whole gang!

until next year...

Friday, October 19, 2012

Pumpkin Patch


We ventured to the patch last weekend to grab our stash.
We are definitely quickly running out of room for pumpkins! Who knows what we'll do next year with THREE littles?!

We are very much into "If he does it, so do I" stage.
And they are pretty much inseparable. Fingers crossed that helps with moving them in together in a few months!


Our rule for pumpkin selection: have to get it to the wagon. This was E's solution.
We gave in due to creative thinking.

Monday, October 1, 2012

Gettin' Spooky {decor}

A few weeks ago, the fall box came down and slowly but surely our house is turning a bit spooky! I've made a new front door wreath which I'm in absolute love with. Already scheming up Christmas ideas so I can keep it out!
{tutorial found here}

Our entryway inlet has a few added touches:
I got the print a few years back and added my mustache hoop art that wonders around downstairs without a permanent home. The beware sign was a dollar store score.

Our mantle:
At this point, just a hod-podge of what was already on it plus a few random additions. The candy corn garland I made out of felt and is hung on black ric rac. The witch print is found here. And the centerpiece pallet sign is incomplete {still need words} and will eventually go to another home. But it works there for now until I mail it off. 

The winning space thus far is our bat wall! It turned out so awesome. Amazing what 50 little card-stock bats can do! The flight of the bats:


{tutorial found here}

Happy harvest month!

Tuesday, November 1, 2011

Halloween Recap

The boys' costumes were finished just in time! Phew! I had a blast creating and hunting down pieces to make them complete. 

E's was pretty simple. I didn't make anything for his Macgyver/Macgruber outfit. He already had the collared shirt and skinny jeans and boots. I found his vest at Target and just loved it, so I ignored the fact that it's not exactly utility! It's a 3T so he'll get plenty of wear out of it. The bomber glasses were purchased online.

 Compared to the real deal:
Now, for T's costume. That took a bit more woman-power.

I basically did an "A frame" style. It's super easy and super quick. I wanted to keep the construction simple because I'd never done this before. Here's the costume in its pieces.
That's the back, front with a long strip to go between his legs, and the two shoulder straps. As you can tell, Velcro and I were BFFs on this one. I used red and white felt. Since Joann's was out of gray felt, I used gray fabric and reinforced it with my extra white felt. The gray pieces took about seven trials before getting it just right. Let's just say, it's a really good thing I'm starting this whole "homemade costumes" with infant size!  I stuffed the front and back with pillow stuffing to give it extra dimension.
T made THE cutest utility knife I've ever seen!

So how did the whole trick-or-treating thing go? We did about three houses before calling it quits. E had a long and too-much-fun kind of day at Gpa's and Gma's so he was ready to hit the hay early. BUT he did love saying hi to our friends and getting a few pieces of candy. And T? Well, he fell asleep in Gma's arms after the second house.

Monday, October 17, 2011

Work In Progress

And so it begins!! Eek! :)

It's a good thing I bought a yard and a half of red felt. I'm going to need the extra for all my trial and error!

Friday, September 30, 2011

DIY Halloween Wreath

Okay, still not officially back on the DIY wagon just yet, but I could not pass up sharing this wreath that I did last year. Super easy and super fun if you get someone else to do it with you!

{Archive from 10.18.10}

The original source of this fun project is on the Woman's Day website. This project is super cute and pretty easy once you get the hang of it! Plus it costs next to nothing. And with my current obsession of all things decoration, I jumped at the chance to try this out.

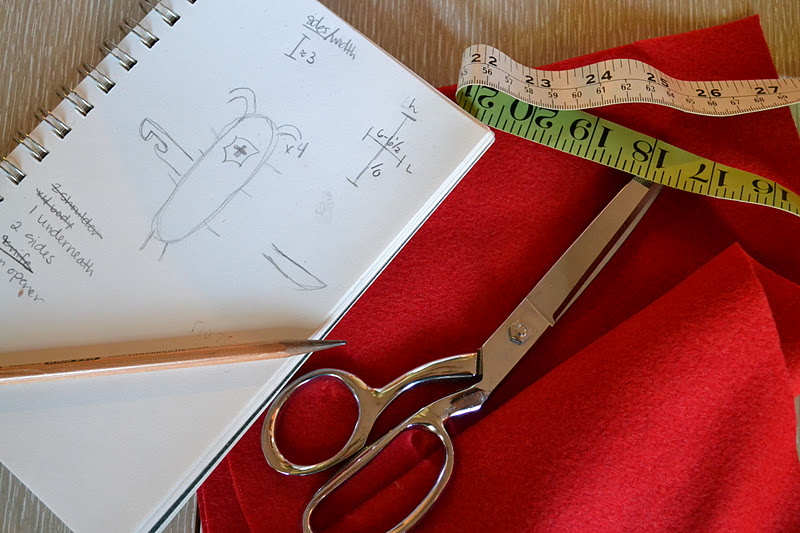
And what a bonus: my savvy and crafty girlfriend, Megan, was in town. I just had to invite her over for a morning of gettin' crafty! {More on her amazing talent later this week}. The day before our craft date, I gathered the supplies I didn't have from Michael's {make sure to use mailer coupons}...
Foam Wreath Ring 
Black Duct Tape
Ribbon
Hot Glue Gun & Sticks
1-2 Bags of Candy Corn (not pictured)

{Side notes: I went with the 12'' ring wreath since our townhouse entry is pretty small. The 16'' can also be used which is pictured on the magazine cover. I also picked wired ribbon because it has more structure and firmness; easier to work with. I was hoping for a more halloween-ish ribbon, but wasn't happy about the options.} 

That evening, I went ahead and completed the first step so we won't have to wait to use the duct tape. I covered the wreath completely in the tape.
Thankfully, there's no wrong way to do this step. I just smoothed out any bubbles and edges along the way. In the end, most of it is covered by the candy corn. 

It was recommended to lay out the candy corns to get a feel for how they will go. We tried that.
Didn't really seem to work. When we tried to start gluing, the nearby corns fell off. We then lined the inner part of the wreath with ribbon. We hot glued every so often as we laid the ribbon around.  In the end, this helped out a ton because we were super low on candy corn. Plus it gives an extra pop to the wreath.

Next came the full-on commitment part: gluing down the candy. Our first row started at the edge of the ribbon. All candy corn pointing in the same direction. The big thing is to make sure the white tip ends are touching or close to touching the next candy as you move along the circle.
Then we worked ourselves out the outer edge of the wreath. Making sure to alternative the direction of the rows. We tried to always end at the same spot so whatever gaps {if the candy didn't match up to a perfect enclosed circle} would all eventually be covered by the ribbon.

It took me about three rows to finally understand the candy spacing around the circle and feel like I was doing it right. 
Once all the way around the wreath with alternating rows of candy corn, put some ribbon around the top. Leaving enough ribbon to tie a bow to finish it off.

Most of the crafters on the website said it took them about an hour. We took way longer. Probably because we were talking, hanging out with Ezra, drinking coffee, and at one point I ate breakfast. :) So it took us about 2.5 hours. Not the average time, by any means. 

And I only lost two fingers to glue gun burns! A small price to pay for a great finished project that I'm in love with:

To preserve the wreath for next year, use some mod podge after removing the ribbon. Brush on in small sections all around the wreath. Have left over candy corn?? Here are some more great decor options for the extras.

Thanks, Megan for a great and fun craft date!! So wish we could do these more often!