Monday, July 18, 2011

Garage Sale Tips!

 {source}
I don't know about where you live, but it's definitely garage sale season around these parts! We've already been to a small handful of them and scored some sweet deals-- including E's awesome nightstand.

And it's about time that we complete the recycle and re-use circle by participating in our annual neighborhood sale this weekend. Our friends across the street are leading it up this year and I've volunteered to help get the advertising/sign-age going. And thanks to all the wonderful, experienced DIY bloggers, I've come across some helpful tips to making this year another success. 
All Things Thrifty has some great advertising tips.

Centsational Girl also has some fabulous tips along with a link party.

Real Simple has a great article on the topic.

Other helpful posts I found here, and here.

Things we plan to try this year:

-BIG and consistent COLOR sign-age: keep it all one color, and use poster board size on high traffic streets. Both cross streets to ours are high traffic which will be super helpful in bringing people in.
-Staging/Styling: Try to be visually appealing when grouping items together. We're selling some desks, a rug, lamps, and other household decor/furniture items so taking the extra effort in staging them will make them more appealing to customers.

-De-clutter in advance: Set aside time AHEAD of time to go through your house. Really ask yourself if you need/use these items. Once they're in the garage, waiting for the sale...they stay there!
-Have a free bin: Especially great for customers who have little ones, and it encourages them to stick around just a little bit longer. ;)

-Set up early and don't turn people away: I think we may set up the garage the night before to get a head start on those early birds. I'd rather a sale with the discomfort of an early bird than have an extra load to haul away. We noticed that the majority sales happened before 10am anyway.

 
I noticed that many said to price out every item while other said only the larger pieces. I think we may compromise and have a few tables out labeled a $1 or $5 so we don't have to price each item. Plus, as the day goes on, the lower prices will fall.


We learned a few years ago that the sale is better than getting a good price. We low-balled most of our items and had very few piece left to lug to Goodwill or the dump. That for us was a huge success! W & I found that we value the peace of mind and extra space rather than making a huge profit from the day.
 
Any tips/advice you've found helpful??


Thursday, July 14, 2011

Nursery/Office Plan

I can finally say that we're so close to having a blank slate to work with in this space. It's taken several hours, spread over several days {we have a 18 month old, 'nuff said, right?}. The crib is put together, junk has been removed, and things are moving along! So, here's what I've been gathering for this room...and thankfully it already has a lot going for it that we'll end up keeping.
The Low Down

1. E never had a mobile simply because I didn't really want to spend the money for one. Poor deprived kid!  Since then, I've seen lots of alternative ideas for cheap. One being these tissue pom poms from Martha Stewart. Talk about easy on the time and budget!

2. I made a fabric banner for E's baby shower and never got around to putting it up in his nursery. Since it has some distinct olive hues in it, I'm hoping it'll work for Boy 2.0's little area. Hopefully, I can figure out a way to blend the pom poms with the banner.

3. I was so ecstatic to find this DIY craft desk tutorial! I love the little cubbies for fabric, ribbons, and what have you. I'm hoping we can fit this in the room as well, although it'll have to be an afterthought for now since time is short. But W is quickly realizing as we go through this room that my craft stuff is overflowing everywhere and desperately needs to be contained!

4) Really thinking I'm going to try this burlap woven board to stick pictures and mementos on! Although, this room has two windows and wall space is already a bit limited. 

5) Antiques! W brought a ton into our marriage {one of the many reasons I love this guy--he already had a love of vintage before I met him!} One such item is an awesome glass washboard that's been sitting in our garage just waiting to go up on a wall. The lingering question is how and where shall this puppy go? We already have a few other antique hat hooks/racks hanging up that will stay, but may get moved around.

It's both a blessing and challenge to already have items to work with. We already have a large Ikea bookshelf taking up some space and some decor items that will stay. However, there won't be as much building with this project and it'll definitely be cheaper. The challenge will be to make sure everything is cohesive and actually works together. Buuut I think we're up for the challenge!

Wednesday, July 13, 2011

Anthro Catalog Yummies & Some DIY Knock-Offs

Got the most recent catalog yesterday and began drooling. Of course, if money was no issue then I'd happily add these items to our house lickity-split. However, with such a steep price tag, I'll have to resort to checking out all the wonderful knock-offs others have to offer. 

Halo Chandelier...$289
Rustic beauty! Totally love the simple look! I was only able to find a knock-off with Mason jars, which I'm sure with some adjusting could look more like this.


Barnwood Hanging Bed...Twin size going for $2,898
Ana White {who's plans we've used before and adore} has plans for a hanging daybed. She used rope material to hang, but I'm sure you can get metal options and just rust-ify it. As well as making new wood look old with some stain. In fact, Young House Love did a great tutorial on that not too long ago.

The Rhododendron Chandelier also pictured above...$898
Apparently, no one's taken on this chandelier yet but I know that there has to be a way! Coffee filters?! Tissue paper?!

And I think there have only been a small handful of times where the thought "Dang it, I'm pregnant!" crosses my mind. And seeing all these gorgeous pieces happens to be one of these such moments. ;)
Wavering Grid Dress

Lemon Liftoff Blouse
Colorblocked Sweater Skirt

Red Peppered Heels

Tuesday, July 12, 2011

Mixed Inspiration Files

While checking out some other uber creative blogs, I found myself bookmarking and 'pinning' galore. Here are a few of my favorites I found recently...

The Swensons are definitely wine-o's around here and have a fine collection of corks. We've created a habit of writing on the ends of each: the date and who we drank it with if it's a special or fun occasion. But I also have an unhealthy obsession with monograms...especially the letter 'S'. I have them peppered throughout our house. So when I saw this easy peasy craft, I knew it's only a matter of time before another 'S' is added to our collection.

Um, can we just simply say this vintage airplane room is just gorg?! I'm not one for themed rooms but this one takes the cake! Of course, it could very well be because it utilizes pallets and old wood to make a cozy rustic feel. Slowly stepping away from boy room reveals-- can't justify looking ahead to the next one. ;)

Chalkboards have been all the rage for quite some time. After seeing this pic, I'm really leaning toward turning one of W's old frames into one. I also already have chalkboard spray paint that I bought awhile ago. So really, what am I waiting for?! I initially wanted to stick it in the kitchen/eating area, but perhaps I'll find a nice little spot in our nurse-office.

Or maybe I'll just scrap that whole idea and go with a burlap board for the room.


So, I'm pregnant. :) I found these beautiful birth stories on Design Mom the other day and have loved reading the variety of ways all these precious babies came to be. One such story is shared by Kristen Frantz who shares two stories: one of defeat and the other of profound satisfaction. She shares how they both answer her deepest questions about motherhood. Simply beautiful.
The cutest little cardboard creation for kids!

The most extensive chevron pattern tutorial I've seen to date.

And lastly, I've been gathering some felt food tutorials for some time now. We bought E a kitchen and are waiting to give it to him once Boy 2.0 is born. It'll come with some pots, pans, and utensils. But he'll need some play food too, right?! How about a yummy breakfast of eggs and bacon?

Yard stick crates! Could be a great addition to our pantry...if/when it gets started done! The tutorial can be found here.

Well, that is quite a mixed bag of inspiration, but that's what I've got! Happy Tuesday!!

Monday, July 11, 2011

Upgraded to Big Boy {Room Reveal}

Mmmmkay, I'm officially back from vacation! After needing two days of recovery plus the weekend, I'd like to say that I'm finally caught up on life as much as normal {not saying much} and am putting the pieces back together. It's amazing what traveling across country with an 18 month old, 3 hours time change, and being 32 weeks pregnant can do for needed recovery time! Thanks for sticking around!!

E's big boy room is officially done! Okay, I still have some pictures I want to hang, but the stores I've stopped at for frames have been out of stock. And I'm still on the hunt in my storage boxes for some clear fishing string to hang his airplane. Minor details that I'm too impatient to wait for.  :)

This weekend we did the last bit of hanging and have finally moved onto the nurs-office room. Which reminds me, I still need to finish that visual plan! We've been gathering all our crap old treasures for our up-coming neighborhood garage sale so it's finally put a fire under our butts to get going! That and we only have like 2 months before we have a new baby!

I didn't really do proper 'before' pictures {DIY fail} since I never really did a nursery reveal, but here are a few that I have.

A quick reminder of what my vision was for the room, at the very start...way back in like, March:
I'm still quite amazed that we stuck so closely to the inspiration board. I'm a huge fan of these now because as you know, I'm hugely indecisive. Making this really helped set the vision, and gave me the confidence when making hard decisions with so many good choices! Think the only major digression was making navy a dominate colors.

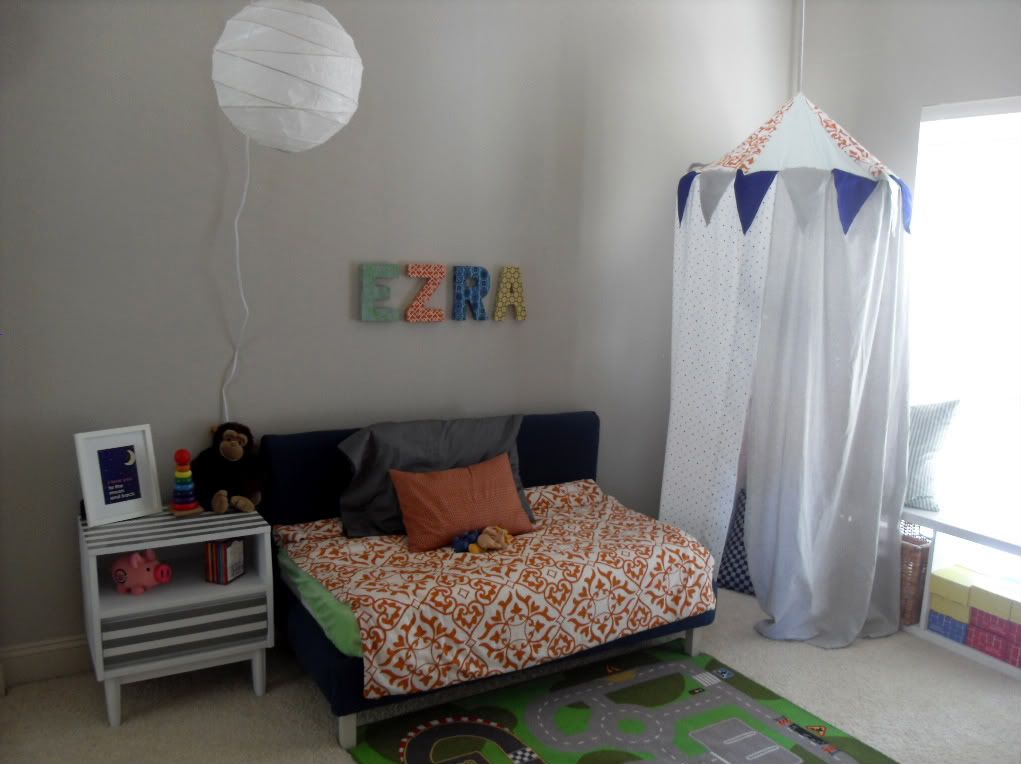
So, without further ado, here's Ezra's big boy room in all its glory!

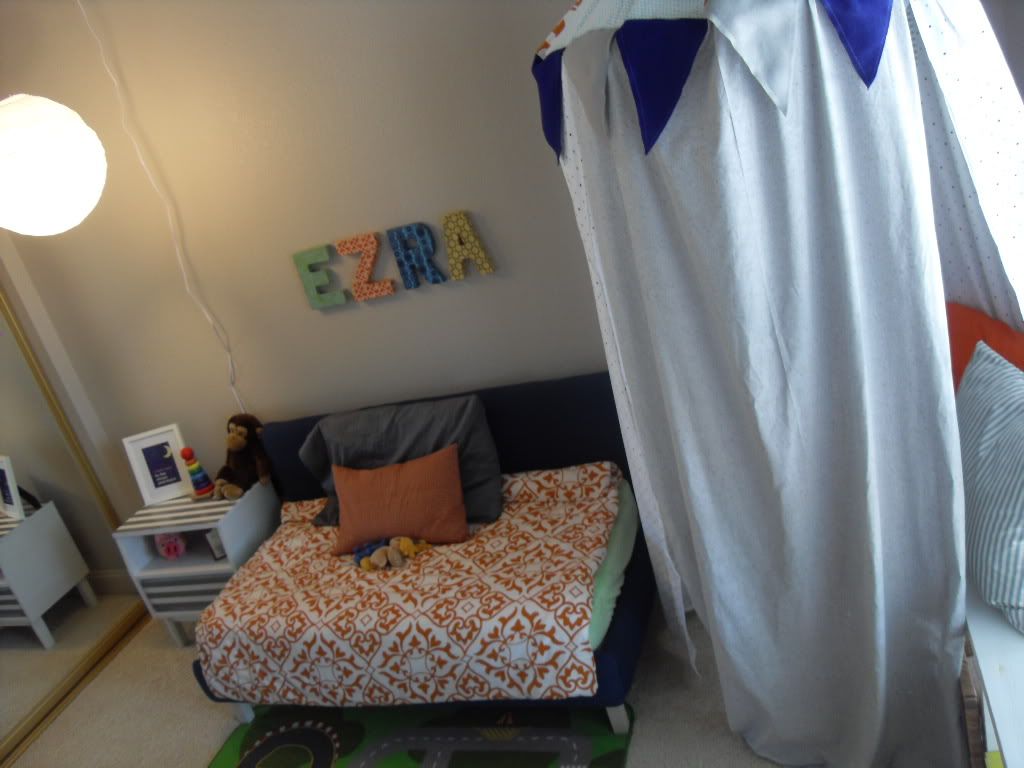
We hung his fabric covered letter with Velcro squares. And hung a lamp from the ceiling.

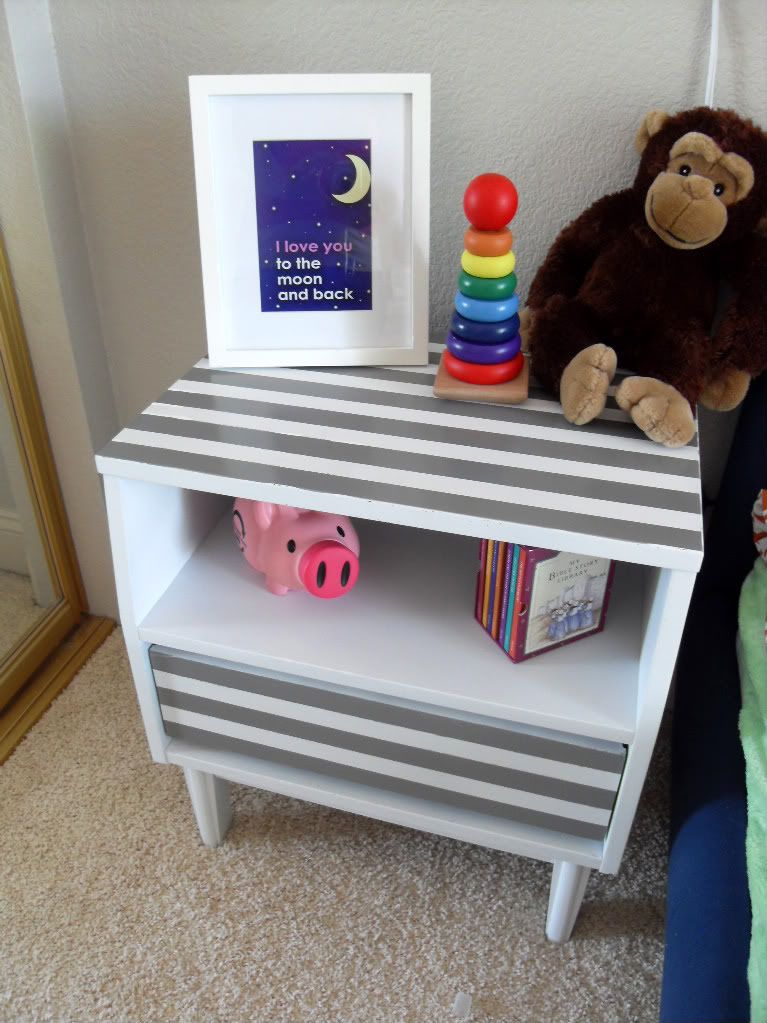
My striped project proved to be the perfect nightstand for Ezra's bedside. For now, the drawer holds some puzzles and musical instruments. I'm sure he'll be storing his little treasures in there in no time.
 
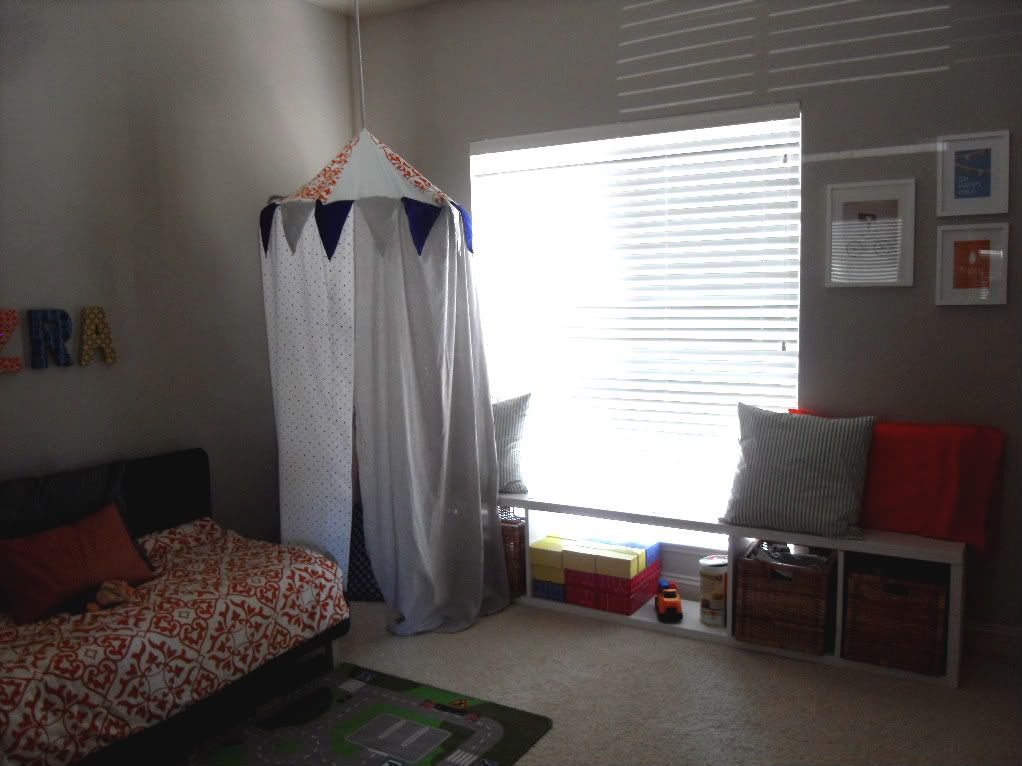
I love that this room gets SO much natural light, but my camera is lame so this is the best I could get of his window wall...ick!

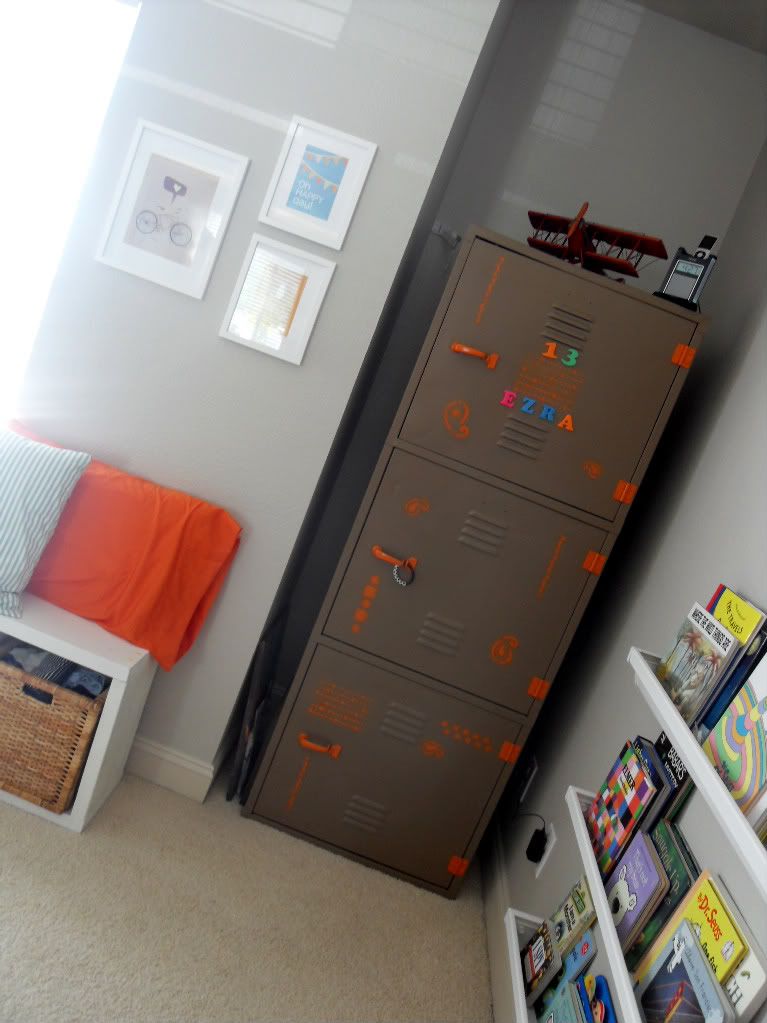
That's the airplane that will be hung over his locker. The top also holds his sound machine that we still use.

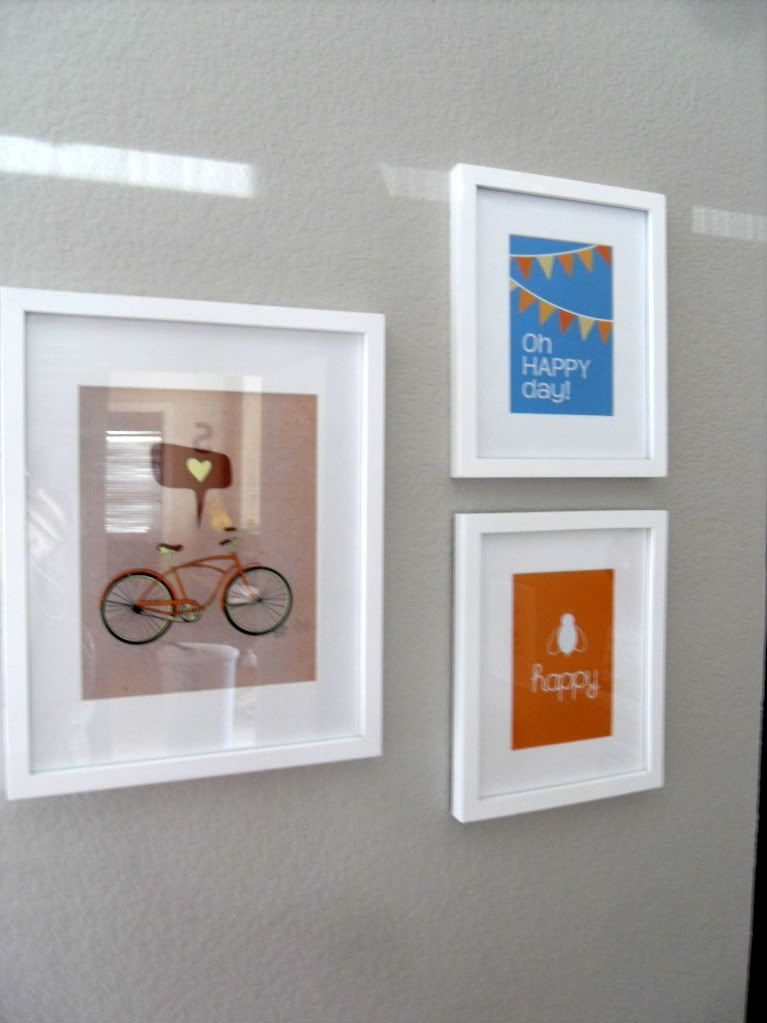
 A few prints that I fell in love with and that incorporate his current obsession as well as the color scheme.

We hung the 'read' over the gutter shelves and I put his recently acquired fireman hat there for now. Ezra totally fell in love with his little table set the moment we put it up. He actually likes sitting there to flip through books and points to the other chair for us to sit.

Another print by the same artist as well as some mood lighting. When I saw this delightful little orange ball lamp at Ikea, I just couldn't pass it up!

And there you have it. A little toddler room that can hopefully spur on the love of reading and a vivid, playful imagination.

Sources
Wall Paint: Martha Stewart's Sharky Gray {seriously, want to paint my whole house in this color now.}
Window seat: DIY
Baskets for storage in window seat: Ikea
Fabric for window pillows: Joanns, Antique thrift store, and Walmart pillow cases
Toddler Bed: DIY, fabric: Joanns
Bedding: DIY; fabric: antique thrift store
Bed pillow fabric: Walmart pillow case, Joanns
Chinese Lantern: CostPlus
Fabric Covered Letters: DIY
Rug: Ikea
Nightstand: DIY, garage sale find
Hanging Tent: DIY
Locker: DIY
Airplane: Ross
Gutter bookshelves: DIY
Table and chairs: Ikea
Orange Lamp: Ikea
READ sign: DIY
 Book print: Etsy
Bike print: Etsy
Moon, Bee Happy & Happy Day prints: found for free online...still looking for those links...
Frames: Walmart

Holy Moly, Batman!! That's a heck of a lot of D-I-Y letters. I totally didn't realize all that we have accomplished. No wonder this has been in the works for several months now! But I can say that we are both super proud and astonished by all that we did together. I honestly never knew we had it in us! We really didn't start this whole fun 'doing-it-yourself' hobby until almost a year and a half ago when W redid a free locker on the side of our road. So, if we can do it, so can YOU!

{linking up below}

Wednesday, July 6, 2011

Honorable Mention

We're back from a wonderful, fun-packed vacation and were absolutely giddy to come home to this...

Our latest stripe project was featured on T&J's DIY inspiration weekly post earlier this week. We were so delighted to see it while checking out all the other inspiring projects. W loved all the striped and stencil wall projects-- here's hoping that we can try it out soon!! ;)

Saturday, July 2, 2011

Out of the Office...

Well, even though we are on vacation all the way across the US, I was still hoping to update. Unfortunately, W's aunt and uncle don't have internet {gasp!} at their house so it'll just have to wait until we get back. BUT I'm excited to share some fun projects that we've been working on!!

Stay tuned!